Featured

Wednesday, May 30, 2012

Monster Party 3rd Birthday

Our little man turned 3 in April and we hosted a monster themed party this year. I wanted to buy clipart and design everything myself, but knew I wouldn't have enough time to finish it all before his party. For some reason March flew by and April was well under way before I realized his party was rapidly approaching!

I ended up ordering a personalized party kit from Your Printable Party on etsy.com. The kit came with everything and more! It was just the right colors and just the price. The entire kit only cost $29, and she personalized the invitations, cupcake toppers and banner! It was nice not to have to worry about doing everything myself, however, I did feel a little guilt about having created his first and second birthday party themes from scratch. I think I will for sure go back to designing my own again for his birthday next year, but this worked great too!

So without further ado, here is a look at Hudson's 3rd Birthday Bash.


The big balloons on the floor in this picture are actually punching balloons from the cheap toy end-cap at Target.


I did actually make this, well sort of, the designer provided the pennants and I added the photos. I made it just like I have for past birthdays. I picked my favorite picture from each month of the year and then put them in order starting with his birth month. It's a fun way to see how he changed over the course of a year!!


I made Cookies & Cream cupcakes from a recipe I found on Pinterest. I'll be sure to share it in a future post because they were pretty darn good. But if you can't wait, just click on the Pinterest button on the sidebar and it will take you to my boards.

The kit also included coloring pages which I really liked as favors for the kids, so I added them to the goodie bags.


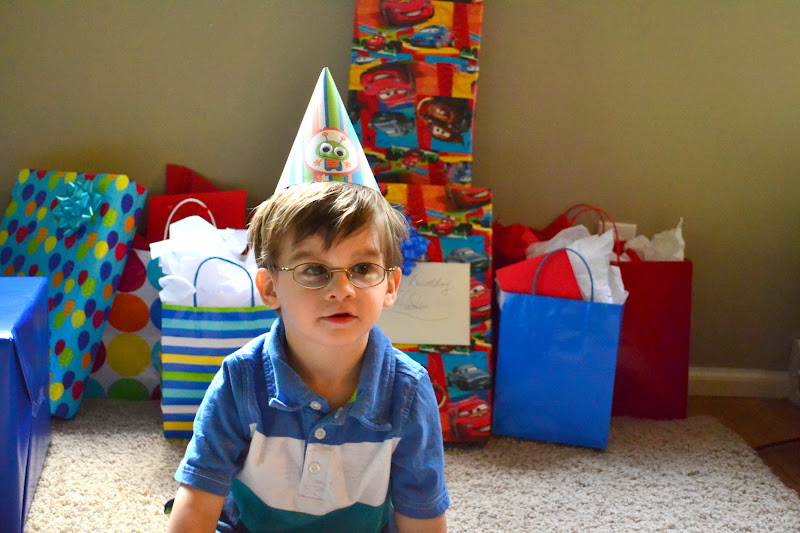
I decided to add an extra touch to Hudson's party hat by gluing on googly eyes. It was pretty cute!

This was the best family picture we got that day...not the best photo we've ever taken, but that's the way it goes with kids. And it's still a great moment frozen in time!

It was a fantastic party and most importantly, Hudson loved it!

I highly recommend Your Printable Party if your looking for cute, personalized AND affordable party decoration kits!

**Harper's first birthday is just around the corner and I AM designing her party myself. I can't wait to see how it turns out. The theme is mermaids!! It's so much fun to change things up a bit and throw a girly party! I'll be sure to post all about it!**


Photobucket

Tuesday, May 29, 2012

Recipe Time: Lemonade Cake

This recipe was really pretty simple and turned out great! I made it for a cookout we hosted over the holiday weekend and followed the recipe exactly. So perfect for summer!!


 I found the original recipe on Pinterest, but you can find it here on the Better Homes and Gardens website.

Lemonade Cake

Ingredients:

1/3 cup butter

3 eggs

2 1/4 cups all-purpose flour

1 teaspoon baking powder

1/2 teaspoon baking soda

1/2 teaspoon salt

1 1/3 cups sugar

1/4 cup frozen lemonade concentrate, thawed

1 teaspoon vanilla

1 1/4 cups buttermilk or sour milk

Yellow food coloring (optional)

Lemon Butter Frosting

Thin lemon slices (optional)

Directions:
1. Allow butter and eggs to stand at room temperature for 30 minutes. Meanwhile, grease a 13x9x2-inch baking pan; set aside. In a medium bowl stir together flour, baking powder, baking soda, and salt; set aside.


2. Preheat oven to 350 degrees F. In a large mixing bowl beat butter with an electric mixer on medium to high speed for 30 seconds. Gradually add sugar, about 1/4 cup at a time, beating on medium speed until well combined. Scrape sides of bowl; beat for 2 minutes more. Add eggs, one at a time, beating well after each addition. Beat in lemonade concentrate and vanilla. Alternately add flour mixture and buttermilk, beating on low speed after each addition just until combined. If desired, stir in a few drops of yellow food coloring. Spread batter into prepared pan.

3. Bake for 30 to 35 minutes or until top springs back when lightly touched. Cool in pan on a wire rack. Spread cake with Lemon Butter Frosting. If desired, garnish with lemon slices (slices should be removed before eating).

Lemon Butter Frosting
Yield: 2 cups Ingredients

1/3 cup softened butter

1 cup powdered sugar

1/3 cup frozen lemonade concentrate, thawed

1/2 teaspoon vanilla

3 cups powdered sugar

1 - 2 teaspoons frozen lemonade concentrate, thawed

Directions:
In a large mixing bowl beat softened butter with an electric mixer on medium speed until smooth. Gradually add the 1 cup powdered sugar, beating well. Beat in the 1/3 cup frozen lemonade concentrate and vanilla. Gradually beat in the additional powdered sugar. Beat in additional frozen lemonade concentrate to reach spreading consistency. Makes 2 cups.


Enjoy!

I'm linked up here:


Photobucket

Tuesday, May 1, 2012

Summer Family Fun List 2012

Last year I created a summer fun list for our family as a way to do all the things that we're always saying we're "going to do" and never actually get around to doing. It worked like a charm, even while I was 9 months pregnant, we were heading out for a picnic and picking strawberries! It was awesome! I was able to document most of the activities for the blog and for our Project Life album.

Since the list was such a success last summer, I decided I better make a new and improved version for this summer. I was able to include some new activities this summer because Hudson is a year older and able to participate in more activities.

So without further ado, I give you the 2012 Summer Family Fun List:

If you would like your own list you can download it for free HERE.


ENJOY!


*If you do download the file I would love a shout out and credit for my awesome creation.*

*Please note that this is for personal use only and may not be sold or reproduced for profit.*

I'm linking up here:


Photobucket