Featured

Thursday, October 7, 2010

Fantastic Fifty!

I finally made it to 50 followers!!!!  I'm sooooooooo excited!  And since I'm in the process of starting my own party decor/planning business and 50 is such a big number, I figured why not give away 2 banners to celebrate the occasion.  I have one for Halloween and one for Thanksgiving. 

So, if you want to see the banners and join in the giveaway, you'll have to come back tomorrow to enter! 
I don't think you'll be disappointed!

I love my followers!!!!  Hope to see you tomorrow!


Photobucket

More Candy Corn!

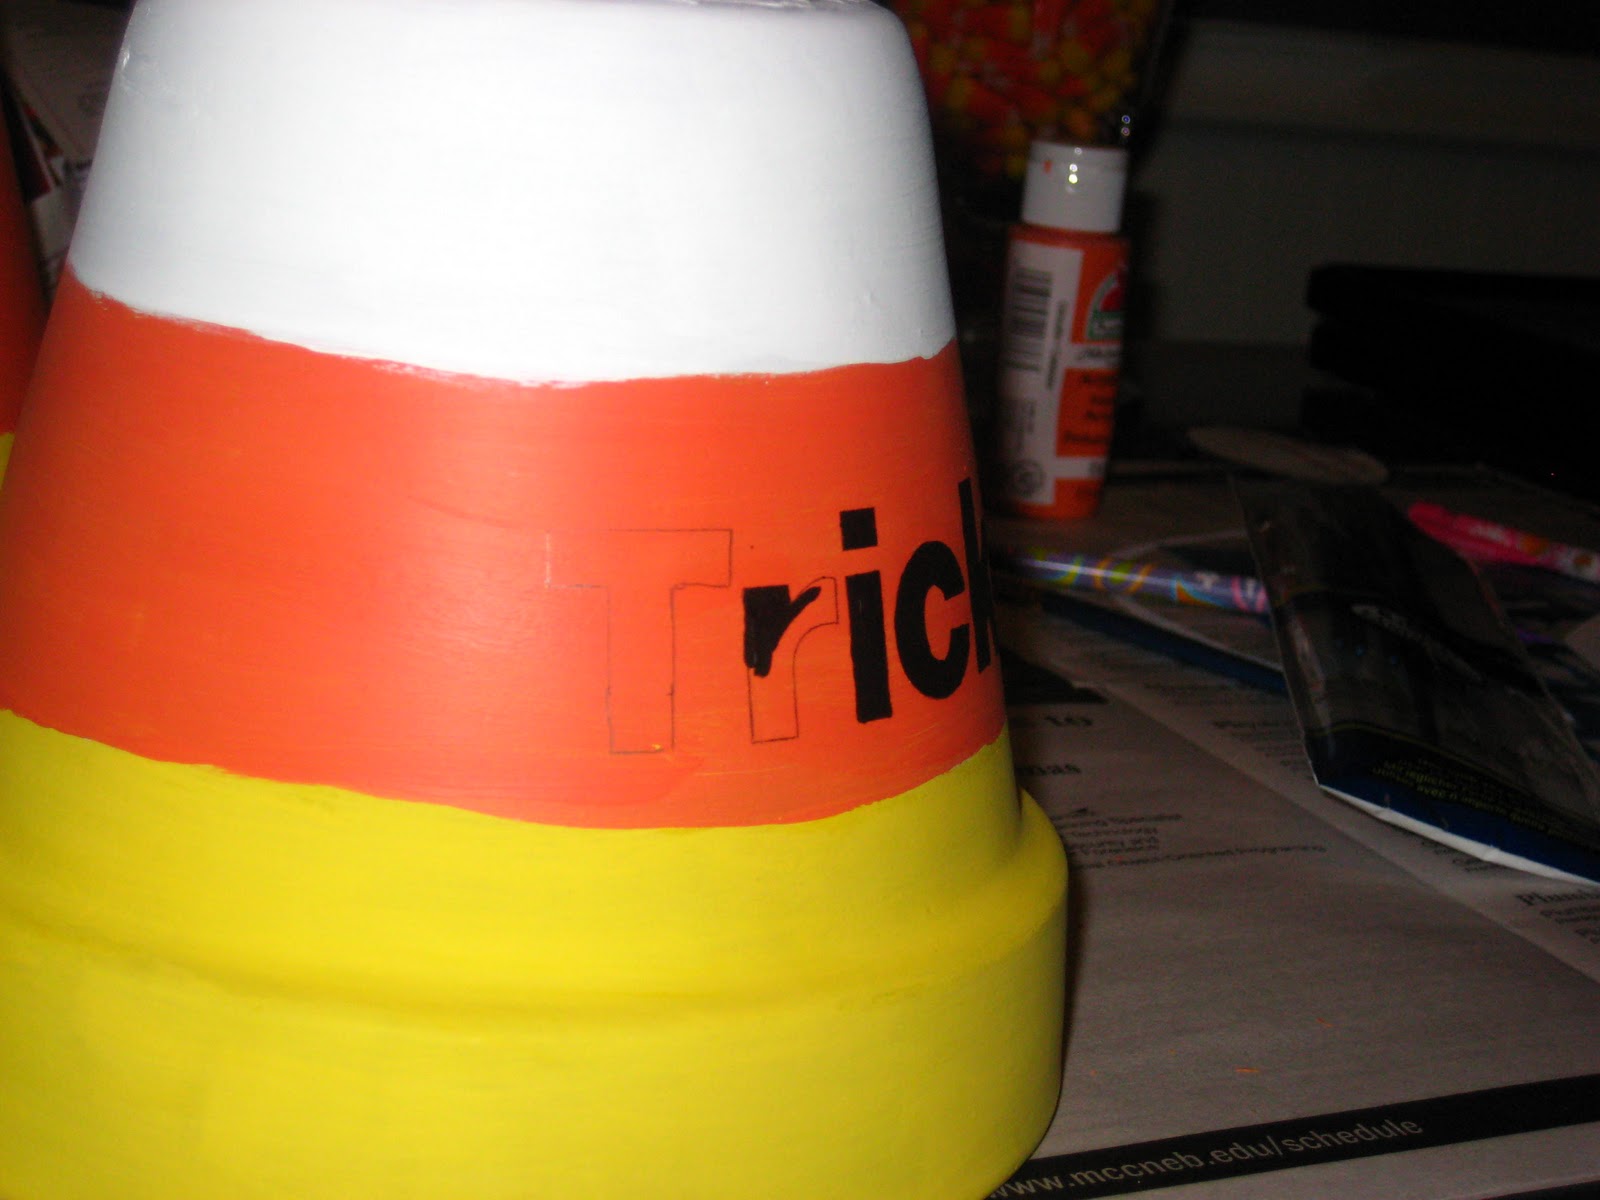
I liked my candy corn project yesterday so much that it gave me an even bigger and better idea.  So, last night I ran out to pick up some medium sized terra cotta pots and got to work as soon as I got home.  Here is what I did:

First I primed my pots with latex primer.

Then I painted the layered colors of the candy corn.  I didn't take pics of this because I figured it's pretty self explanatory.  After the paint was dry, I used a stencil to trace on some letters spelling out Trick-Or-Treat, and then painted the letters black.  Painting the letters was the most tedious part.


 Here are my cute candy corns!!  I think I'll put them on the front porch surrounded by pumpkins!

 Like I said yesterday, I didn't want the lines to be straight, but if you do, just use painter's tape and that should do the trick.

I also think it would be really cute to get the big terra cotta pots and use them as pumpkin stands!!  I don't have any pumpkins yet, otherwise I would have tried it with these.

The total cost to make this project:  $9.00 for the pots.  I had everything else on hand.

Here is where I'm linking up today:


Photobucket

Wednesday, October 6, 2010

Shout Out

I have to give a shout out to Leslie at Night Owl Crafting for featuring my Countdown to Candy calendar!
Thanks Leslie!  And if you haven't been by her blog yet, you need to check it out! 


NightOwlCrafting


Photobucket

Candy Corn Project

I had an idea for a fun candy corn project, so I went to our garage, looked around, and realized that I already had what I needed to make it.  I've seen lots of cute projects done with terra cotta pots, but no candy corns yet. 

The only supplies I used were a paint brush and some acrylic paint.


And here is what I came up with:

I think it looks really cute!

I didn't want the lines to be straight since they aren't straight on real candy corns, but if you do, you could use painter's tape.

I only had a small pot, but I think I may go get two big pots tonight and paint them to create another project for tomorrow!  So excited!

You could also add a ribbon:


Here is another way to use it:

I filled a cellophane bag with candy corn and popcorn, slapped a cute tag on it and it's ready to be given as a gift!  Doesn't get much easier than that!  I love it!!  You could fill it with anything.

Hudson wanted some, but he's still too little.  Bummer!

I made this tag in less than five minutes using Word.

So I'll be back tomorrow with the addition to the candy corn pots!!

Have you made any projects using terra cotta pots?  I love to hear about them!

Here is where I'm linking up today:


Photobucket

Tuesday, October 5, 2010

Another Feature!

My Countdown to Candy calendar was featured again today!  I can't believe it!  So cool! 
Thanks Stephanie!


UndertheTableandDreaming


Photobucket

Halloween Treats

Last year we took little man out trick-or-treating to a few of our friends houses.  He was only 6 months old, so we really couldn't do  too much!  I didn't want to go empty handed, so I made some yummy treats for Hudson to deliver to our friends.

Mud Pie Cups
*Sorry about the bright flash.  This was before I was a blogger and we were in the car.

Ingredients:
Instant chocolate pudding (2 boxes made 8-10 treats)
Milk
Oreo cookies
Gummi worms

*There may be different recipes out there, but this is my version, and it's super simple.


Directions:
Prepare pudding according to package instructions.  Let set in refridgerator.

Place Oreo cookies in a gallon sized ziplock bag, seal, and crush with rolling pin.  Try to get the pieces as small as possible.

Get your containers ready and place a small amount of cookies crumbs into bottom of container.  I used clear plastic cocktail cups.

Then top with pudding leaving some room at the top for more cookie crumbs. 

Layer more cookie crumbs evenly on top of pudding.

Add gummi worms as decoration!


Hudson last Halloween as a giraffe.  Wasn't he so cute?!

Here is where I'm linking up today:

Crazy Domestic

Photobucket

Monday, October 4, 2010

I'm Speechless!

I can't believe it!  My cute Countdown to Candy calendar was featured four times this week already!!   I'm so flattered!  It's definitely encouragement to keep up the crafting and to get to work on something new...and I think I have an idea!  Thanks so much ladies!!  And if you haven't been to these blogs yet (which I'm sure you have) you should definitely check them out!
Photobucket


Pantry Update

Our pantry has looked the same since the day we moved in, bad.  We moved in in a rush, shoved all of our food in and never looked back.  I finally got to the point that I couldn't take looking at the ugliness of it all anymore!  So, Friday afternoon I tackled my pantry update in just a couple of hours.  A little paint, some organization and some labels go a long way...

Here are some before pictures...please don't stare at the ugly floor...it has some water damage and needs to be sanded and re-stained, but that's another day.


What do you think of the high gloss yellow paint?!  Yikes!

The shelves were disgusting, but we did have shelf liners on them.

Even the ceiling of the pantry was painted the ugly yellow!!

Here's my little man helping mommy...well, more like getting in the way!  But he was having fun!

 I used Fresh Aire paint (low VOC) from Home Depot.  The color is  called Of The Earth.  I didn't use white because I though it would show wear and tear more easily.
 We recently moved the trash can into the pantry because the little man was always playing with it and throwing everything away.

Here is an after pic of the shelves all organized.

 And here is what my shelf labels look like.  I made them with my P Touch label maker that my sweet hubby got me for Christmas a couple years ago.  He knows how much I like to be organized!

For a project that only took me a couple hours and no money to complete, I think it turned out pretty good!  It looks so much better than it did and now I can find everything!!

Here is where I'm linking up today:


 Photobucket

Saturday, October 2, 2010

Crafting with the Stars

I entered my Halloween Countdown Calendar for a chance to participate in Crafting with the Stars!  If you get a chance click over there and view my calendar (even if you've already seen it here) because she mentioned that the number of views may help my chances of getting chosen.  It's so exciting!

Click here to see my project and vote by clicking on the picture of my calendar.

Here is where I'm linking up today:


Photobucket

Friday, October 1, 2010

Thursday, September 30, 2010

Journaling

I'm blown away by the creativity of  Christie at Grace Is Overrated.  She has created the cutest journal pages!  I've been printing them out and look forward to filling in the blanks every morning.  Some days they really inspire me and get me thinking!  Here is just one of the pages:


She is so talented isn't she?!  Head on over and check out her blog.  I'm sure you'll be inspired too!

Where I'm linked up today:


Photobucket

Wednesday, September 29, 2010

Leave It to Martha

I get the Martha Stewart holiday newsletter emailed to me and today I saw the cutest idea (who am I kidding, they are all great ideas!).  But I really liked this one in particular.


(image courtesty of marthastewart.com)

Broomstick candy holders!!

Wouldn't this be so cute and easy to make for kids to take to school, or give to a teacher, or as a halloween party favor?!  I might have to think of a reason to make some of these.  Any suggestions? 


Photobucket

Tuesday, September 28, 2010

Recipe Time: Chocolate Chip Cookies

I found this recipe on allrecipes.com about 2 years ago and it has become my go-to chocolate chip cookie recipe.  It's the best one I've found over the years.  They're soft in the center and crunchy around the edges...so delicious!

Ingredients:

2 cups all-purpose flour
1/2 tsp baking soda
1/2 salt
3/4 cup unsalted butter, melted
1 cup packed brown sugar
1/2 sugar
1 tbsp vanilla extract
1 egg
1 egg yolk
2 cups semisweet chocolate chips (I only use about 1 1/2 cups because I don't like as many chips)

Directions:

Preheat oven to 325 degrees.  Grease cookie sheet or line with parchment paper.

Sift together the flour, baking soda, and salt.  Set aside.

In a medium bowl, cream together the melted butter, sugar and brown sugar until well blended.  Beat in the egg, egg yolk and vanilla until light and creamy.  Mix in the sifted ingredients a 1/3 at a time until just blended.  Stir in the chocolate chips by  hand.  Drop about a tablespoon of cookie dough at a time onto the prepared cookie sheet about three inches apart.

Bake for about 12-16 minutes depending on oven or until edges are lightly browned.  Cool on baking sheets for a few minutes before transferring to a cooling rack.


I bet you'll love 'em too  Enjoy!!

Photobucket
(image courtesy of gettyimages)

Pumpkin Update: Half and Half

The pumpkin is much more orange now (half orange/half green) and the tiny pumpkin is now about the size of a softball.  So, it looks like we really will get more than one!  Yay!!

Isn't is pretty?!

So happy to have another one!  I don't think it will get very big, but I like them little anyway.

I saw this little guy lurking around.  Kinda cute...


Photobucket