

Tuesday, October 26, 2010
MIA
So I realize that I've been extremely absent from the blog lately, but I can promise you that I have a good excuse! I'll be able to fill you in more next week, so hold tight and don't give up on me. I'll be back in action soon!! Thanks for stopping by and hopefully I'll at least post the pictures of the baby shower decor by the end of the week.

Friday, October 22, 2010
A Long, Busy Week
It has been a long week and I'm so glad that it's Friday!! I've been designing the decorations and invitations for my friend's baby shower that's being held this weekend and will be sure to feature it all on Monday. It's an owl theme and couldn't be cuter, so stop back on Monday to check it out!! But here is a little preview for now:


This cute little owl was designed by Crystal Wilkerson and can be found at creativitybycrystal.blogspot.com
Here is where I'm linking up today:
Wednesday, October 20, 2010
DIY Luggage Tag
A few years ago I started making personalized luggage tags as gifts for friends and family. I basically taught myself how to do it and now I'm going to teach you. It's simple, but there are a lot of steps. The cost is minimal if you're anything like me and already have most of the supplies. Let's get started.
Supplies:
scrapbook paper
white cardstock
photo laminating sheets (these are the sheets that don't need to go through a laminating machine)
scrapbook letter stickers (another options is to print out the letters)
double sided tape
hole punch
eyelets
ribbon


Supplies:
scrapbook paper
white cardstock
photo laminating sheets (these are the sheets that don't need to go through a laminating machine)
scrapbook letter stickers (another options is to print out the letters)
double sided tape
hole punch
eyelets
ribbon

First, you need to cut the scrapbook paper to fit inside the photo laminating sheet.

Next, either print out the first or last initial of the person receiving the tag or cut a small square from white cardstock and attach a scrapbook sticker in the center. Then, use the double sided tape to attach it to the center of the scrapbook paper.

Once you have it attached, grab the laminating sheet and center the scrapbook paper with the letter side facing away from the sticky side. When you have it where you want it, remove the backing of the sticky side and carefully smooth it over the scrapbook paper.

Use your hole punch to punch a hole through the top, center of the tag, making sure to go through the scrapbook paper.

Optional: Use an eyelet to seal the hole and make it look more decorative. Then pull the ribbon through the eyelet and tie.

Aren't they so cute?!!
And the back can be used to write (with permanent marker) the owners information in case they lose their luggage.

These tags are awesome and can be used for anything you want; luggage, diaper bags, purses, gym bags, etc. Since they are personalized for the recipient, they are extra special.

These would be perfect for small Christmas gifts for friends or co-workers, stocking stuffers, birthday gifts, moving gifts...just about anything!!
Where I'm linking up today:
Monday, October 18, 2010
Lego Birthday Party
My sister, Ashley, threw a Lego birthday party for my 6-year-old nephew and I thought she did such a good job that I wanted to feature it. Here are some of the pictures from the party:


The table centerpiece

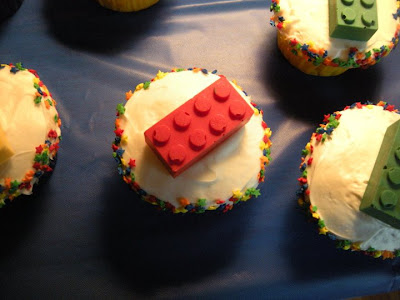
The cupcakes

Banner

Cupcake toppers. She made chocolate legos using candy molds. Don't they look real?

And of course I had to add a picture of my cute nephew!

I wish I had a picture of the invitations. They were very cool.
I've been seeing a lot of Lego parties on blogs and I think hers ranks right up there! Great job Ashley!
Friday, October 15, 2010
Winner, Winner
First, I want to thank everyone who entered my first giveaway! Reaching 50 followers was such a big deal to me and I really wanted to do something to thank everyone who visits my blog regularly. Hopefully I'll be able to have another giveaway soon...maybe when I reach 100 followers!
Anyway, on to the winner of the Halloween and Thanksgiving banners. Random.org picked #11,
Rachel at Holy Craft!!!
Congrats Rachel! I hope you enjoy the banners!!

I've been trying to find a Halloween shirt for H and haven't have any luck. Well, I was at Michael's last night and found a cute iron-on for $2.99, so I decided that I'd make one myself instead.

I think he's going to look really cute in it!!
Here is where I'm linking up today:
Thursday, October 14, 2010
Feeling Very Fallish
*REMINDER* Please don't forget to enter my first giveaway HERE!!! It ends tonight at 10 p.m. and the winner will be announced tomorrow (Friday) morning.
I'm in a very fall mood this morning. I guess it's the cooler weather that set in yesterday or the adorable gourds I picked up at the supermarket.


I'm in a very fall mood this morning. I guess it's the cooler weather that set in yesterday or the adorable gourds I picked up at the supermarket.

I am loving the little white one with all the warts. I'll be saving seeds from it to see if I can grow some next year!
I wanted to do something fun with these, so I grabbed my glass pumpkin and a bunch of acorns that I gathered from the neighbors house and put them all together. I like how it looks, but it needs more gourds and acorns and then it will be the perfect centerpiece!

I'm not crafting today because we have to take Hudson back to the eye doctor for a check-up, so this morning I'll be flipping through my new Pottery Barn holiday catalog...

and enjoying some coffee with my new creamer! It's so stinkin' delicious!!!

Oh, but first I need to thank Allison at House of Hepworths for featuring my Candy Corn Pots!
Thanks lady! I'm so glad you liked them!
Here is where I'm linking up today:
Wednesday, October 13, 2010
Ghostly Welcome
*REMINDER* Please don't forget to enter my first giveaway HERE! You have the chance to win two holiday banners. One is for Halloween and the other is for Thanksgiving. There are 3 ways to enter to win. The giveaway ends tomorrow night at 10 p.m. (Thursday) and the winner will be announced Friday morning.
I saw a project similar to this in my BHG 100 days of holidays email and thought it was a really cute idea.
Supplies:
cardboard
cutting blade
white and black paint
paint brush
I didn't take step by step pics because I figured it was pretty self explanatory. Here is the final project:


I saw a project similar to this in my BHG 100 days of holidays email and thought it was a really cute idea.
Supplies:
cardboard
cutting blade
white and black paint
paint brush
I didn't take step by step pics because I figured it was pretty self explanatory. Here is the final project:

First I drew the shape of a ghost onto the cardboard. Once I was satisfied with the way it looked, I used my blade to cut it out. Then I drew the hole for the mouth and cut that out.


(Just look at all those leaves that fell yesterday!)
I painted the cut out white first using two coats of white craft paint, and once it was dry I painted on the eyes with black craft paint. Here he is before the glitter. Cute, but he need a little something more.

I thought it would be cute to write something on him. So I used a glue pen, spelled out B-O-O and then used orange glitter to give him some sparkle!


Not bad for a free and easy project! I like that it has a little glitter now!
Here is where I'm linking up today:
Tuesday, October 12, 2010
Halloween Basket
I mentioned before that we took Hudson trick-or-treating last year, but just stopped by a few friends houses since he was only 6 months old...and couldn't even eat real food yet. Well, this year he'll only be 18 months old and still can't eat much candy, so instead I thought a little gift bucket would be cute.
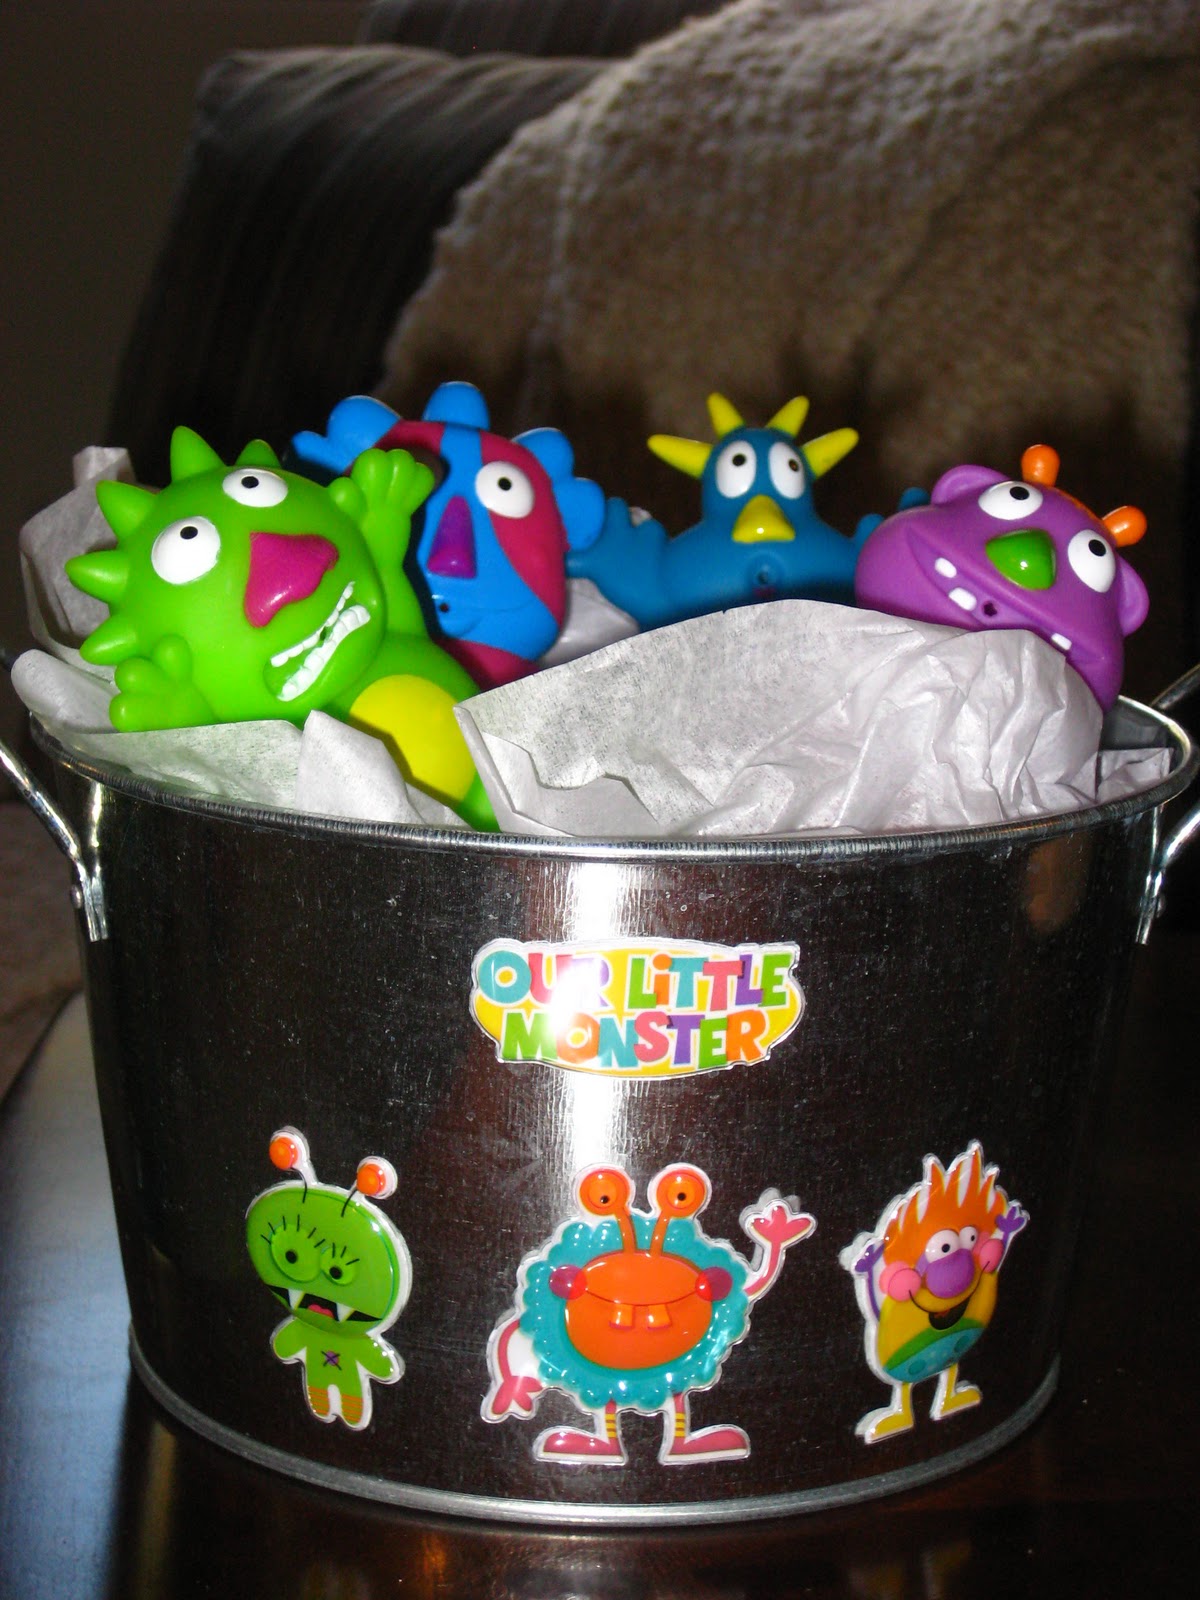
I've been seeing tons of adorable, bright and colorful monster stickers at all the craft stores, so I picked some up. I used a metal bucket that I had on hand. I actually bought ten buckets in the dollar section at Target 3 years ago for our wedding and have been using them for all kinds of things around here. They've come in very handy!
Anyway, I decorated the bucket with the stickers and then added his name with scrapbook stickers to personalize it. Once the bucket was finished, I filled it with a little tissue paper and some fun monster bath toys, which can be found at most Target stores. They are made by Alex Toys.
I think it turned out really cute and know Hudson will just love it! This would be a great gift for friends or family members who have kids under 2! You an find similar buckets at Home Depot and fill them with all kinds of fun things!


This is really perfect because little man is dressing up as a monster this year!
*REMINDER* Please don't forget to enter my first giveaway HERE for a chance to win some holiday banners. The giveaway ends Thursday and the winner will be announced Friday morning. There are 3 ways to enter, so get to it!!
Here is where I'm linking up today:
Monday, October 11, 2010
Pumpkin Update: Harvested!!
*Reminder* Please don't forget to enter my first giveaway HERE for the chance to win 2 banners, one Halloween and one Thanksgiving. The giveaway ends Thursday, Oct. 14 at 10 p.m. and the winner will be announced on Friday.
We decided it was time to head out to our mini pumpkin patch and pick our pumpkin! It was almost completely orange and our front porch was in need of some color. The pumpkin is a little smaller than it looked on the vine, but still big enough for Hudson to carve...well he won't actually be the one carving it, but you know what I mean.


The small pumpkin is still on the vine and has changed from light green to dark green, so hopefully that means it will be changing to orange soon and then we can pick it too.
We decided it was time to head out to our mini pumpkin patch and pick our pumpkin! It was almost completely orange and our front porch was in need of some color. The pumpkin is a little smaller than it looked on the vine, but still big enough for Hudson to carve...well he won't actually be the one carving it, but you know what I mean.
Here's the hubby cutting it off the vine.


I think even the little man was excited about it!
(His glasses were broken all week, but we got them back on Saturday.)

It has some cool warts!

I'm so proud of my first pumpkin...technically I grew my own pumpkins in first grade, but this time my parents didn't help me!

(not my best picture!)
The small pumpkin is still on the vine and has changed from light green to dark green, so hopefully that means it will be changing to orange soon and then we can pick it too.
Friday, October 8, 2010
My First Giveaway!!
*********************THIS GIVEAWAY IS NOW CLOSED****************************
In honor of reaching 50 followers I wanted to have a giveaway. I've mentioned before that I am in the process of opening an Etsy shop and starting a business designing party decor and what better way to get the word out than to give something away! So, I've made two banners. One is for Halloween and the other is for Thanksgiving. The winner gets both banners!! There are 3 ways to enter:
Please leave a separate comment for each so increase your chances of winning!
*Becoming a follower of Home Inspired Bliss and leave a comment letting me know, or leave a comment letting me know you already follow
*Post about the giveaway on your blog or facebook and leave another comment letting me know
*Leave a comment telling me what holiday is your favorite!
This giveaway ends Thursday, October 14 with the winner announced on Friday, October 15, 2010.
The winner will be chosen at random using Random.org.
Here are the banners!!
Halloween Banner

I used spider web paper in neutral colors to match anyone's decor.

Here you can see more detail.

This paper is a cream color with the spider webs as well.

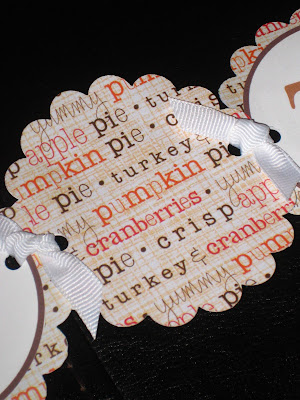
Thanksgiving Banner

Here is what the paper looks like up close. I LOVE this one and will be making one for myself!
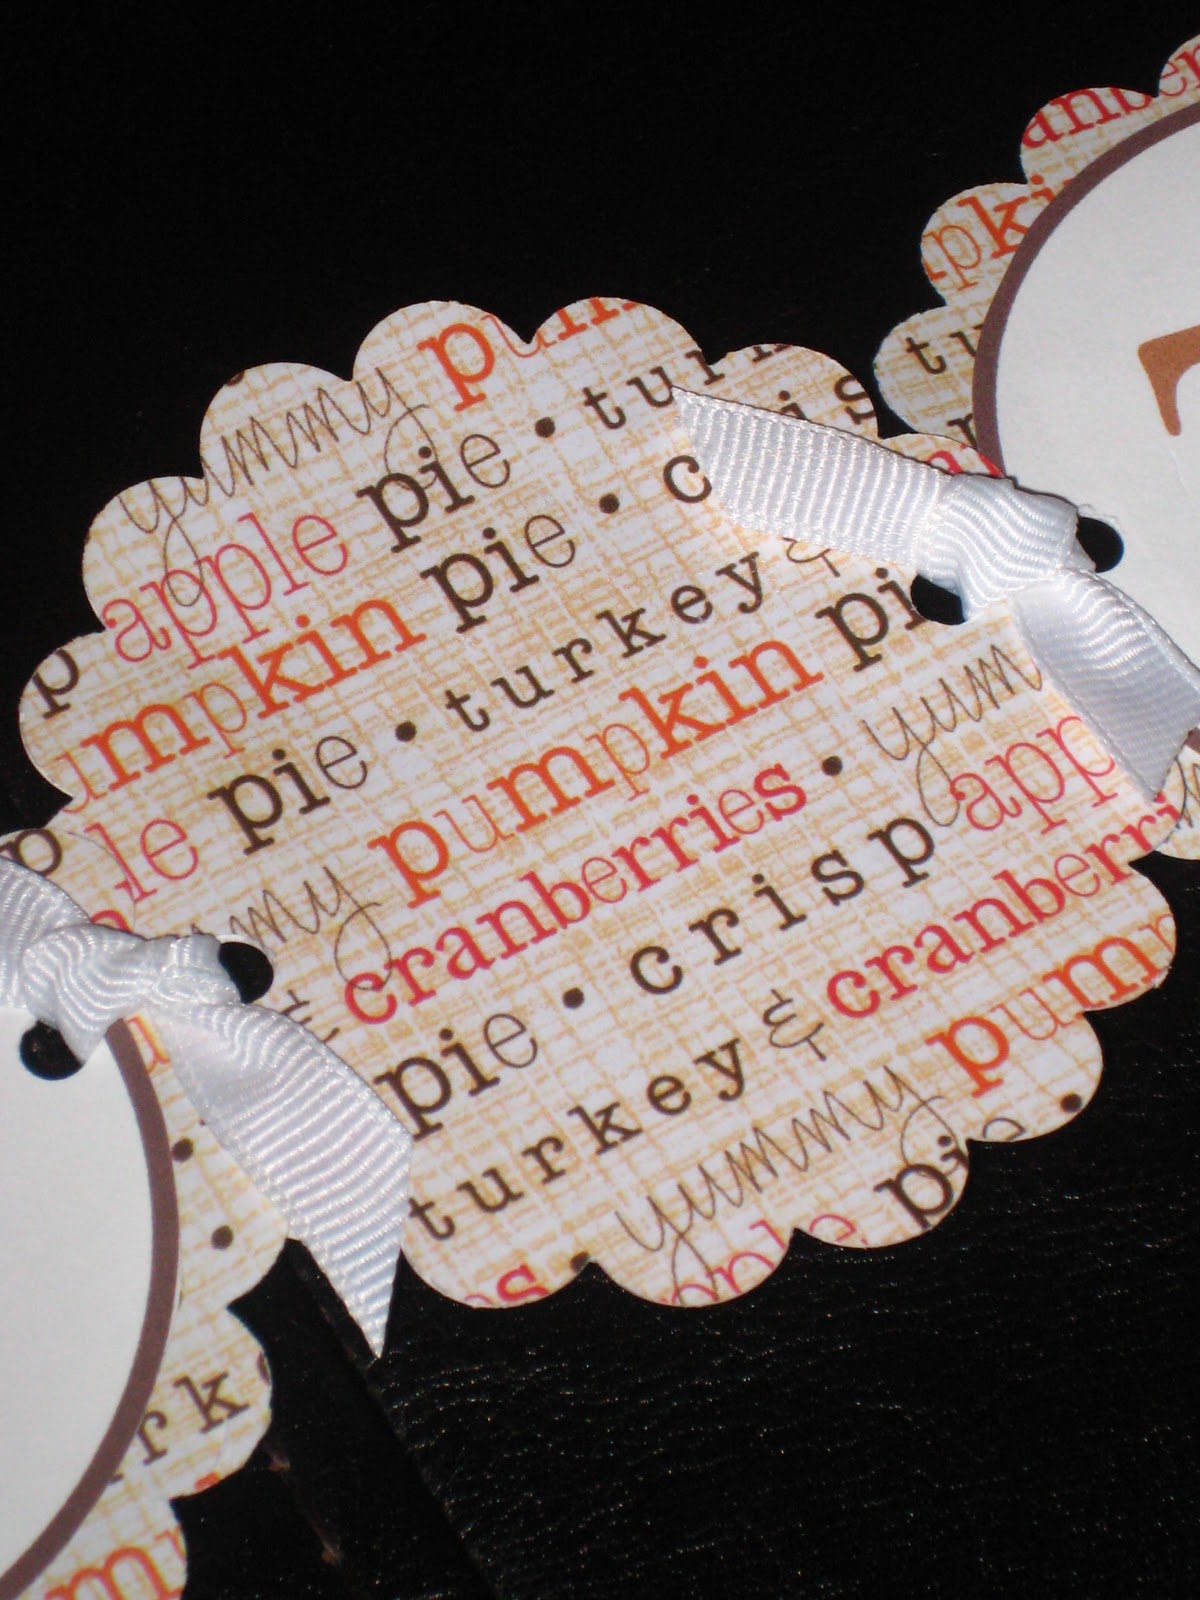
I am by no means a photographer (mostly because of my crummy camera), so this picture doesn't do it justice, but it's really pretty and would look great hanging on a mantel or draped on a mirror.

I'm so thrilled to be having my first giveaway (as if you can't tell) and I hope you all like these as much as I do!
Where I'm linking up today:
Subscribe to:
Posts (Atom)