Featured

Wednesday, August 29, 2012

Epic Room Makeover Entry

Hi Everyone!

While checking my favorite blogs yesterday, I saw that Mandi over at Vintage Revivals is doing her Epic Room Makeover Contest again this year and it's open to anyone living in the lower 48 states, so I've decided to enter our living room into the contest. To check out Mandi first Epic Room Makeover click here.

Now I know I have like no chance of winning, but our living room is a hot mess, so I figured what the heck! So here goes nothing...

Mandi,
Our living room is in desperate need of a makeover! It's a large room with a very awkward layout due to oddly placed windows and strange cut outs. See photos below.

Really odd placement of windows! It was built in the 1960's, so maybe that has something to do with it.
(That space under the windows is always empty, or filled with toys. What am I supposed to put there?!)

Here are the strange and very hard-to-work-with cut outs. There are three in this one little area! AHHH!!!! I hate them SO much! The cut out in the hallway has a mirror in it and it's awful. The cut out by the stairs is filled with pictures. (I only did that because that's what the former owner had done and I didn't really know what else to do.) And the third cut out up by the ceiling is large and I have no idea what to put up there!
(By the way, how ugly is this railing? It's so bad!)


And here is another pass through into the kitchen. This wall is hard to work with as well because it's not dry wall. It's some sort of wood paneling under the paint. I think it could look really cool if we could figure out what in the heck to do with it!


And it's really difficult finding a rug to fit the room. We actually had this one made from a carpet remnant that we had bound. We have no idea how to place the furniture! We bought new furniture when we moved in and decided on a couch and two chairs, but it's just not enough seating when we have company.

I've also had a hard time finding things that I like to put on the walls. They're SO bare and don't get me started on the window treatments or the lighting! And I really don't love having the couch up against the railing, but we don't know how else to do it because of the tv. 

It's all terrible, but really overwhelming!!

It's a large room with high ceilings and some great character, but there are so many odd things about it that we're not really sure where to start. We REALLY need your help! I'm so embarrassed of this space and it's where we spend ALL of our time together as a family and do our entertaining.

I just know that you could make it look AMAZING!

Help, Help, Help! I would love to have a happy living room for my family to spend time in!


Photobucket

Monday, August 27, 2012

My Life-August 2012

I want to start a new regular post here on the blog called My Life. It will be my way of filling you in on what's going on with us and the kids.

So to kick off the My Life posts I want to share with you the trip that Jeremy and I just took to celebrate our 5 year anniversary.

I'll start by saying that I'm an avid follower of Elise Blaha Cripe's blog, so when she mentioned in one of her posts about a hotel in Big Sur, California that she and her husband visited, I had to check it out. She made it sound really cool, so I went to the website to do a little more research and fell in love!

We were planning to go to San Fransisco, but decided that a trip to Big Sur was the way to go and exactly the kind of trip we were looking to take. It looked calm and serene. We typically look for adventure and lots of sight seeing when we go on vacation, but since we haven't been on a trip alone since having the kids (we've never even spent the night away from them except when I was in the hospital having Harper!), I wanted something peaceful and relaxing without a lot of action. We are constantly on the go when we're home, so I wanted to be able to sit and actually talk to each other without a 3-year-old screaming in our ears. Anyway, we ended up booking a 3 night stay at Glen Oaks Motel in Big Sur, California.

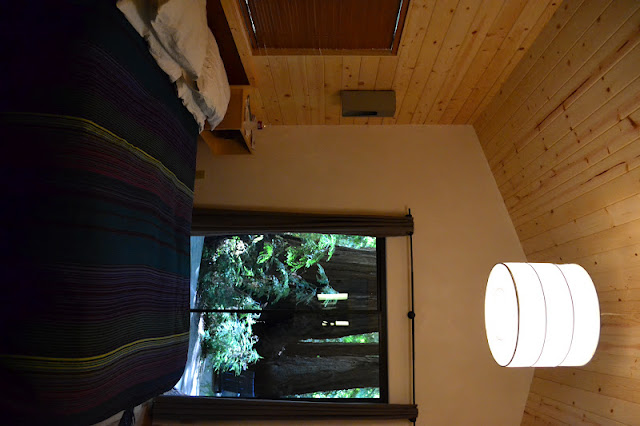
It was amazing!! It was a short trip, but an amazing trip. We stayed in a Little Sur Cabin and loved every second of it! Apparently we ended up with the most requested Little Sur Cabin with the best fire pit. How perfect for celebrating an anniversary! The cabin was small like a hotel room and just as nice as a hotel room. We both agreed we would stay there again in a heartbeat! The private fire pit was the best part. We sat, relaxed, drank wine and talked about our first 5 years of marriage and what we thought the next 5 years would bring. Love, love, loved it so much.

Our cabin #8 hidden behind the trees.

Our fire pit which was just a few steps from our cabin door.

 Jeremy was tending the fire.


Besides having an awesome cabin to stay in, we spent much of our time driving along the coast, taking lots of pictures and eating some truly delicious food!


The redwoods were breathtaking. Seriously gorgeous.


 The beach has purple sand. It was cool.

I have to mention that we went to the Big Sur Bakery on our last day for both breakfast and dinner. They had awesome coffee and pastries for breakfast. I got a doughnut with espresso icing. YUM! And Jeremy had an almond croissant that he loved. I had a bite and it was tasty. The service was so good and the restaurant was so quaint that we wanted to go back for dinner. We were sat in the best seat in the house (according to our server) on the patio overlooking the mountains and ordered beer and wood fired pizza. It was scrumptious!

Wood fired pizza.

The moon over the ocean. This was the best moon shot I could get without a tripod.

We also decided to leave early on Saturday morning to drive through San Fransisco to see the Golden Gate Bridge and tour the city a little before heading to the airport to go home.

It was cold, rainy, windy and foggy at the bridge so I didn't get good pictures, but at least I can say that I was there and drove over the bridge!


So, that's what we did last week and why I wasn't around. I'm so glad that I read Elise's blog post and showed it to my husband. We've been a lot of places together, but this trip was definitely one of our best! It was such a fantastic trip! Maybe we'll go back for our 10th anniversary!


Friday, August 17, 2012

Booster Seat Complete

I just finished my third sewing project! I'm so proud of myself for taking the plunge and trying something new, especially because I'm very intimidated by my sewing machine!

A few posts ago I talked about some of the projects and homemade gifts that I wanted to get started on early this year. One of the projects was to make Hudson and Harper booster seats for the kitchen table. Actually, Harper won't need one for a while yet, but I figured while I'm making Hudson's, I might as well make Harper one too.

I was inspired by this tutorial that I came across on www.pinterest.com. They looked pretty simple, but since I'm new to sewing, I had no idea how they would turn out.

The goal:


My completed booster seat:


It looks like the one above, right?!

It's nice and thick.

I did it! The tutorial was easy to follow along for a beginner like me. I didn't have any trouble understanding the steps. I was nervous, but it was really easy! The hardest part was getting the tablecloth cut to the right dimensions...well that was probably because my kiddos were trying to climb all over it while I was cutting!

In case you're wondering, I bought my vinyl tablecloth at Target on clearance a few weeks ago for $2.50. I like the pattern and the colors, but wish they would've had something with stripes or polka dots. Oh well, I guess this will add a little bit of summer to our house all year round! Maybe next summer they'll have something I like better and I can make some more.

If you would like to make your own booster seats, head on over to http://smashedpeasandcarrots.blogspot.com. It's a great tutorial!

I'm so happy with my completed booster seat! The more I sew, the less intimidated I am and the more I enjoy it!

Happy Friday!


Photobucket

Tuesday, August 14, 2012

Kid Craft: Football Sensory Bottles

After making the Fireworks in a Bottle sensory craft, I had all kinds of ideas for more sensory bottles swirling around in my brain. Both of my kiddos really liked the bottles and Hudson had fun making his own, so I knew it would be something we would do again.

Since football season in just around the corner, and in our house, we are pretty big college football fans, I thought making some football themed bottles would be fun! We made two bottles again, but this time we made one bottles with Nebraska Cornhusker colors and one bottle with Iowa Hawkeye colors. We are a divided house when it comes to football. I'm the Nebraska fan and my hubby is the Iowa fan.

Anyway, on to the craft!

Football Sensory Bottles

supplies

plastic water bottles
ribbon-I used red & white, black & yellow
football confetti
glitter

instructions

Cut ribbon into strips of all different lengths. I was trying to make my ribbon resemble pom poms.

Add the ribbon to empty bottles.

Add football confetti to bottles.

Add glitter to bottles. I used silver because that's what I had on hand, but I think it would be cool if you used the school colors. *Tip* I made a funnel out of a sheet of paper so that Hudson wouldn't get it all over the place.

Once you have everything added to the bottles that you want, fill the bottles with water leaving a small amount of space at the top and then seal the lids on with a little bit of glue. By sealing the lids with glue, you don't have to worry about the lids coming loose and the contents spilling out.

Let them dry for a few minutes and then they're ready to go! Shake, shake, shake and watch it swirl!


Cost breakdown:
bottles-free, had on hand
red, white, black and yellow ribbon-$2.00, each roll cost $.50 at Michael's
football confetti-$.99 at Michael's
silver glitter-free, had on hand

total: $3.00

This is a simple and inexpensive project for little kids. I already have an idea for a fall inspired sensory bottle. I'm obsessed!

If you end up making your own, come back and post a link. I would love to see what teams you cheer for and how yours turn out!

Have Fun!


Photobucket

Monday, August 13, 2012

Kid Craft: Washi Tape Binoculars

Hi! I'm back with a fun kids craft to share with you. Now this is not an original idea. I have seen other binocular crafts while surfing blogland, but I've never seen any made using washi tape.

This would be a great craft for older kids to make themselves, but my kids aren't quite old enough yet.

I've been meaning to make some for Hudson for some time now, and finally did it yesterday! I know, I know...but sometimes I just don't have as much time in the day as I would like. I'm trying harder to make more time for crafting and diy though! There are just so many things I want to make! Ahhhhhh...

On to the project!


Washi Tape Binoculars

supply list:

2 cardboard tubes-I used toilet paper rolls, but you could also cut a paper towel roll in half

washi tape-I used 4 different patterns

stapler or hot glue gun

hole punch or scissors

ribbon, string, baker's twine, etc. for the strap

instructions:

The first step is to decorate your rolls with washi tape. This is the fun part! You can make them look however you want! Hudson has been really into hunting for dinosaurs lately, so I wanted to make his look safari-ish (I think I just invented a word...). I used scissors to cut the tape so that my lines would be straight, but you can definitely just tear it.

one down, one to go

completed rolls

Step two is attaching the two rolls together. I used a stapler and attached them together where the washi tape seams came together. I didn't really want to get out my glue gun, so I convinced myself that the staples would hold better anyway, and it actually worked out great! *note* If you're worried about the staples not being safe for your kiddos, then you can attach them together with glue or even tape. This was not an issue with Hudson's binoculars, but I made some for Harper too (so that she wouldn't constantly be trying to steal Hudson's) and I made sure to press the sharp ends tight to the cardboard and then covered them with pieces of washi tape. *not pictured*

here is a shot of the staples

Once the rolls are attached, you can use a hole punch (or scissors) to make a hole on each side of the binoculars where you want the string for the strap to be.


Then chose a ribbon or string, whatever you have laying around, string the ends through the holes and double knot. You now have an awesome pair of washi tape binoculars!!


That's it! So, so simple! I think it took me less than 15 minutes to make and they turned out great! I did it while I was sitting outside on the deck watching Hudson play soccer. They were instantly a huge hit. He was immediately using them to hunt for dinosaurs! Look out T-Rex!

I love washi tape! Don't you?! There are so many great projects you can make with it!

I'll be back tomorrow with another kid friendly craft!

Have a great Monday!

linking up to these fabulous parties:

http://www.bystephanielynn.com
http://craftomaniac.blogspot.com/
http://www.skiptomylou.org/
http://makingtheworldcuter.com
http://www.keepingitsimplecrafts.com
http://www.tipjunkie.com
http://www.houseofhepworths.com
http://www.somewhatsimple.com/
http://www.733blog.com/
http://www.myrepurposedlife.net
http://tatertotsandjello.com/
http://www.bystephanielynn.com/


Photobucket

Guest Blogging at H&M Kitchen

Hi Everyone! I know I've been a little absent lately. I've had some problems with medication allergies (yuck) so, when I haven't been sick, I've been trying to enjoy what's left of the summer with my family. I plan on being around a lot more now and even want to try to take this blog to the next level! I have some big plans!

Today, I'm guest blogging over at H&M Kitchen. My friend Melissa, creator of H&M Kitchen asked if I would share a recipe with her readers today, so be sure to go over and check it out along with the rest of her and her husband's awesome website! You'll be sure to find some great recipes and very pretty pictures! Don't forget to leave her a comment letting her know you stopped by!

Here's a little peak!


Okay, now I'm hungry!

I'll be back later with a post about a little craft I put together yesterday for the kids. I think you'll like it!


Photobucket