Featured

Showing posts with label Recipes. Show all posts

Tuesday, September 4, 2012

Recipe Time: Slow Cooker Shredded Beef Enchiladas

I've been wanting to make this type of enchilada for a while now, but hadn't come across the right recipe. There is a Mexican restaurant here called Hector's (it's awesome!) and they have a dish I love called the Ranchero Burrito, and I thought maybe I would be able to replicate it at home. I found this recipe on pinterest, but I ended up changing it completely. So here is the original recipe that I came up with and it my husband and I thought it was amazing! I hope you like it too!


Slow Cooker Shredded Beef Enchiladas

ingredients

1 to 2 pound beef roast- I think the one I used was a top round roast (I usually just buy whatever is the cheapest)

1 medium onion, diced (you could also add onion flakes if you're in a pinch and don't have an onion on hand)

1  14.5 oz can beef broth

2  10 oz cans red (mild) enchilada sauce

1/4 tsp red pepper

1/4 tsp Spanish paprika

1/4 tsp black pepper

4 large burrito sized tortillas

1 16 oz can refried beans

1-2 cups shredded cheddar cheese

Optional ingredients: shredded lettuce, diced tomatoes, sour cream

directions

Place the roast in your crock pot and sprinkle with red pepper, black pepper, and paprika. Add diced onion. Pour in beef broth and one can of red enchilada sauce. Let cook 6-8 hours on low setting. *It should fall apart easily when it's finished

After 6-8 hours, remove roast from crock pot and set aside. Add the other can of red enchilada sauce to the remaining sauce in the crock pot and stir. This adds more flavor and thickens the sauce just a bit.

Turn on oven to low broil.

Heat refried beans in the microwave until hot. (This was my hubby's job and I have no idea how long he left them in the microwave, sorry)

Add a generous amount of refried beans and shredded beef, along with a small sprinkle of cheddar cheese down the center of a tortilla and fold like a burrito. Place it on a oven-safe plate or baking dish and cover with enchilada sauce from the crock pot. Then sprinkle with more cheddar cheese. You can add as much or as little cheese as you like. I like a lot of cheese on mine!

Place the plate into oven until cheese is nice and melted.

Remove from the oven-VERY CAREFULLY- and add extras on the side such as lettuce, diced tomato, sour cream, pretty much anything you like. I also like to serve mine with tortilla chips.

Enjoy!

**Please be sure to take care when handling the hot plates. If you don't want to worry about having hot plates, you can always use a baking dish, but then you won't get the plate full of sauce and cheese that makes this dish so good!

I'm sorry about the poor photos. It was already pretty dark by the time we had dinner. And the kids were very tired, so I didn't add lettuce or tomato like I normally would have.


I turned the flash on and it helped a little. I try to get better pics next time I make it!


Let me know if you try it and what you think!

Linking up here:
33 Shades of Green


Photobucket

Tuesday, May 29, 2012

Recipe Time: Lemonade Cake

This recipe was really pretty simple and turned out great! I made it for a cookout we hosted over the holiday weekend and followed the recipe exactly. So perfect for summer!!


 I found the original recipe on Pinterest, but you can find it here on the Better Homes and Gardens website.

Lemonade Cake

Ingredients:

1/3 cup butter

3 eggs

2 1/4 cups all-purpose flour

1 teaspoon baking powder

1/2 teaspoon baking soda

1/2 teaspoon salt

1 1/3 cups sugar

1/4 cup frozen lemonade concentrate, thawed

1 teaspoon vanilla

1 1/4 cups buttermilk or sour milk

Yellow food coloring (optional)

Lemon Butter Frosting

Thin lemon slices (optional)

Directions:
1. Allow butter and eggs to stand at room temperature for 30 minutes. Meanwhile, grease a 13x9x2-inch baking pan; set aside. In a medium bowl stir together flour, baking powder, baking soda, and salt; set aside.


2. Preheat oven to 350 degrees F. In a large mixing bowl beat butter with an electric mixer on medium to high speed for 30 seconds. Gradually add sugar, about 1/4 cup at a time, beating on medium speed until well combined. Scrape sides of bowl; beat for 2 minutes more. Add eggs, one at a time, beating well after each addition. Beat in lemonade concentrate and vanilla. Alternately add flour mixture and buttermilk, beating on low speed after each addition just until combined. If desired, stir in a few drops of yellow food coloring. Spread batter into prepared pan.

3. Bake for 30 to 35 minutes or until top springs back when lightly touched. Cool in pan on a wire rack. Spread cake with Lemon Butter Frosting. If desired, garnish with lemon slices (slices should be removed before eating).

Lemon Butter Frosting
Yield: 2 cups Ingredients

1/3 cup softened butter

1 cup powdered sugar

1/3 cup frozen lemonade concentrate, thawed

1/2 teaspoon vanilla

3 cups powdered sugar

1 - 2 teaspoons frozen lemonade concentrate, thawed

Directions:
In a large mixing bowl beat softened butter with an electric mixer on medium speed until smooth. Gradually add the 1 cup powdered sugar, beating well. Beat in the 1/3 cup frozen lemonade concentrate and vanilla. Gradually beat in the additional powdered sugar. Beat in additional frozen lemonade concentrate to reach spreading consistency. Makes 2 cups.


Enjoy!

I'm linked up here:


Photobucket

Tuesday, April 17, 2012

Recipe Time: Pasta with Walnut Pesto

While I was browsing around http://tastykitchen.com/recipes/main-courses/pasta-with-walnut-pesto/ looking for some new recipes, I came across this recipe for pasta with a walnut pesto. I love walnuts and pasta and pesto! Plus, the directions were so simple. I pinned it to my recipe board on pinterest and made it a couple days later. It was so, so good! Even Hudson liked it! 

You can find the original recipe here.

Ingredients

1 pound Spaghetti


⅓ cups Olive Oil

1-½ cup Walnuts

½ cups Freshly Grated Parmesan

2 cloves Garlic

2 Tablespoons Lemon Juice

Kosher Salt To Taste

Finely Grated Parmesan And Toasted Walnut Pieces For Garnish


Preparation Instructions

Bring a large pot of salted water to a boil. Add the spaghetti and cook until al dente according to package directions.


To a food processor, add olive oil, walnuts, garlic, lemon juice and Parmesan and pulse until all the ingredients are combined. Season with kosher salt to taste.

Toss the walnut pesto with the pasta until the spaghetti is well coated.

Pile into bowl or a serving platter and garnish with finely grated Parmesan and crumbled toasted walnuts.


linking up here:


Photobucket

Tuesday, February 21, 2012

Pinterest Recipe List & Ratings

I've made quite a few recipes from my board on Pinterest...I still have like a million more and counting to go before I've made them all, but this is a start. I thought I would share the list with you and even add mine and my husband's rating to each one. Keep in mind that you may have different tastes than we do, but I thought I would include our ratings for fun. I'm not saying that any of these recipes are bad (not at all), there are just some that I enjoyed more than others and some that I will (if I haven't already) make over and over again. That's what we're basing our ratings off.

We used a rating scale of 1-5 stars with 1 star being our least favorite and 5 stars being the best a.k.a. our favorites. I still highly suggest that if something sounds good to you, you should definitely try it. I mean, isn't finding new recipes that you love so much fun?! I get really excited when I find something that becomes a staple in our recipe book!

So here they are in no particular order:

Better Than Sex Cake
Tashia- 4 1/2 stars (I would have rated it 5 stars if it were topped with Butterfinger instead of Heath crumbles, which I will change next time I make it.)
Jeremy- 5 stars
recipe link

Roasted Parmesan Potatoes
Tashia- 5 stars (These are so good and completely addictive. I could seriously sit down and just eat a giant bowl!)
Jeremy- 5 stars
recipe link

Brussel Sprouts with Parmesan and pecans
Tashia- 4 stars (I'm still learning to like green veggies, but these are delicious)
Jeremy- 5 stars
recipe link

Roasted Chickpeas
Tashia- 1 star(It's possible that I didn't make these correctly though)
Jeremy- 2 stars
recipe link

Sour Cream Chicken Bake
Tashia- 3 1/2 stars (This chicken is very moist and tender. It's pretty good. I have already made it twice)
Jeremy- 4 1/2 stars
recipe link

Parmesan Honey Pork Roast
Tashia- 4 stars (This was different, but really tasty)
Jeremy- 4 stars
recipe link

Applesauce Cookies with Caramel Frosting
Tashia- 4 1/2 stars (I thought these were so moist and delicious! Everyone in my family loved them too.)
Jeremy- 4 stars
recipe link

White Chicken Enchiladas
Tashia- 4 1/2 stars (I love Mexican food and this is a really good, simple recipe.)
Jeremy- 3 1/2 stars (Jeremy said he would have rated it higher, but he likes my chicken enchilada recipe better.)
recipe link

Coca Cola Cake
Tashia- 3 1/2 stars (It is very rich and I think it almost had a little too much glaze. I would make it again, but with less glaze.)
Jeremy- 2 1/2 stars
recipe link

French Bread Pizzas
Tashia- 2 1/2 stars (This is a simple, kid-friendly meal, but I couldn't get Hudson to eat it. Nothing fancy. You can basically make these your own and add anything you like.)
Jeremy- 2 stars
recipe link

Cheese Pinwheel Rolls
Tashia- 2 1/2 stars (These were good, but needed more flavor I thought. Very easy to make though. They're basically like little pizza rolls. Next time I'll add pepperoni.)
Jeremy- 2 1/2 stars
recipe link

Lasagna Rolls
Tashia- 4 stars (I love pasta and this recipe makes lasagna simple. I definitely plan to make these again and again.)
Jeremy- 3 stars
recipe link

Ultimate Chocolate Chip Cookie & Oreo Brownie Bars
Tashia- 4 1/2 stars (These are amazing, but I may have over baked them just a tad because they seemed to get dry and hard quickly, like the next day, but I will totally make them again!)
Jeremy- 5 stars
recipe link

Crockpot BBQ Chicken
Tashia- 4 stars (Delicious and so simple. Yum!)
Jeremy- 4 1/2 stars
recipe link

World's Greatest Sandwich
Tashia- 5 stars (I love a good sandwich and it's hard to make amazing sandwich's at home, but this is awesome!)
Jeremy- 5 stars
recipe link

Banana Ice Cream
Tashia- 2 stars (Just to be clear, this is not an ice cream recipe. It's the recipe where you freeze bananas and then blend them to make an ice cream like treat. It was just okay. I think it would've been better without the peanut butter.)
Jeremy- 1 stars
recipe link

Kansas City Sue's Slow Cooker Chicken
Tashia- 1 1/2 stars (Totally different than I expected and I wasn't a fan. I think I expected it to taste BBQish and it tasted much more like an Asian dish to me. I think I was really caught off guard because I even made it to go over potatoes instead of rice. Now I know why they say to pour it over rice! Ha!)
Jeremy- 2 stars
recipe link

Pumpkin Bars
Tashia-5 stars (So awesome! Even better the next day!)
Jeremy-5 stars
recipe link

Beermosas (Orange Beers)
Tashia- 4 stars (I've always liked these.)
Jeremy- I drink beer beers
recipe link

Cheesy Beefy Enchilada Casserole
Tashia- 3 1/2 stars (Pretty delicious, but next time I'd cut the amount of sour cream added in half. It was a little too overpowering for me.)
Jeremy- 4 stars
recipe link

I have so many more recipes pinned that I can't wait to try. This list barely scratches the surface!

However, I will be taking a little hiatus from baking and even some cooking for a little while. Well, 30 days to be exact. Jeremy and I are starting an all natural, no processed foods meal plan tomorrow. It's part of my One Little Word for the year. I'm really making an effort to become more healthy, but also to lose some of the baby weight that I've accumulated over the past three years and two babies. And I just basically want to see how it improves my overall mood and appearance. By doing this little experiment of sorts, I'm hoping to come away with a more health conscience mind so that I'm making better decisions about what I eat on a daily basis. I guess we'll see how it goes and I'll be sure to keep you posted!

p.s. I will not be giving up my coffee...well my coffee creamer that is. That is the one thing I look forward to every morning and it makes me happy!


Photobucket

Tuesday, January 24, 2012

Recipe Time: Parmesan Honey Pork Roast & Brussel Sprouts

Hi! Today I wanted to share with you another recipe that I found on the best website EVER, Pinterest. I actually bought the food to make it two weeks ago, but my hubby accidentally left the pork roast in the shopping bag on the counter all night. Oops. So, I had to buy another one.

Anyway, both these recipes were really tasty. I definitely recommend giving them a whirl.


Parmesan Honey Pork Roast
original recipe pinned from Six Sisters Stuff

Ingredients:
1 (2-3 pound) boneless pork roast

2/3 cup grated Parmesan cheese

1/2 cup honey

3 Tbsp soy sauce

2 Tbsp dried basil

2 Tbsp minced garlic

2 Tbsp olive oil

1/2 tsp salt

2 Tbsp cornstarch

1/4 cup cold water


Directions:
Spray slow cooker with non-stick cooking spray. Place roast in slow cooker. In a small bowl, combine the cheese, honey, soy sauce, basil, garlic, oil and salt; pour over pork. Cover and cook on low for 6-7 hours or until a meat thermometer reads 160°.

Remove meat to a serving platter; keep warm. Skim fat from cooking juices; transfer to a small saucepan. Bring liquid to a boil. Combine cornstarch and water until smooth. Gradually stir into pan. Bring to a boil; cook and stir for 2 minutes or until thickened. Slice roast; serve with gravy

*Notes*
I thought I had garlic on hand, but I didn't and didn't realize it until I was already half way through preparing things, so I substituted with garlic powder. I'm sure the flavor would have been much better with the real thing.

I thought the roast was really delicious, however, the next time I make it, I think I'll cut the amount of soy sauce in half. I would've liked it to be a little sweeter. I tend to like sweeter sauces over pork. But it was soooo tender and had great flavor. My husband loved it too.

Brussel Sprouts
original recipe adapted from Elise Blaha

As I mentioned before in this post about my One Little Word for the year, I chose the word Nourish. Part of the reason I chose that word is because I wanted to become more aware of the kinds of foods I was putting in my body and make positive changes in my diet. So that's where this recipe comes in to play. I wasn't raised on vegetables. In fact, the only two vegetables that were ever served in our house were potatoes and corn, so over the years I've been trying to acquire a taste for more vegetables, especially green vegetables. It's still a work in progress. So far I've learned to love asparagus...

I've been seeing lots of recipes that make brussel sprouts look so delicious, so I figured why not give them a try?! I came across a new blog that I'm totally in love with, and that's where I found this recipe.

Ingredients:
Fresh or frozen brussel sprouts, chopped
About 2 tbsp olive oil
Salt
Pepper
Garlic powder
Unseasoned, chopped pecans
Large pinch of shaved parmesan cheese

Directions:
Heat about a tablespoon of olive oil over medium heat.

As that gets warmed up, chop your sprouts. The smaller you chop them the better. Cut them in half or fourths if they're big. The frozen ones I used were pretty tiny, so I just cut most in half.

Toss the sprouts into the pan and add a bit more olive oil. Stir them up and sprinkle with kosher salt, pepper and garlic powder. This is an add to taste situation.

Let them cook for about 5 minutes then add chopped, unseasoned pecans. About a handful.

Stir the pecans with the sprouts and continue to cook for about 5 more minutes or so.

Right before you turn off the heat, sprinkle with a big pinch of shaved parmesan cheese.

Turn off the heat and stir in the parmesan.

*Notes*
I've never eaten brussel sprouts in my life, but let me tell you, I really liked these...a lot.

In the original recipe she used garlic salt and pepper. I used garlic powder, kosher salt and pepper. So good! I think it's pretty much just a matter of taste.


Today I'm linking up here:

*images are from the original posts*
I tried to take my own photos, but it was dark outside by that time and they didn't turn out.


Photobucket

Wednesday, January 18, 2012

Recipe Time: Better Than Sex Cake

For my husband's birthday, I told him to browse my Pinterest recipe board to find a dessert that sounded good and I would make it for him. He chose Better Than Sex Cake. I know this is a very popular cake and most people have had some version of it. My mother-in-law has made it before, but her version is a little different. I've never made it myself, but it was soooo easy and incredibly delicious! I'm sure this is one I'll be making again.

This version of the recipe originally came from Barefoot and Baking.


Better Than Sex Cake

Ingredients:

1 box chocolate cake mix (+ whatever it calls for on the back)

1 can sweetened condensed milk

1 jar hot fudge sauce

1-8 oz container of cool whip

4 Skor Bars, crushed (I used Heath bars, but if I when I make it again I plan to use Butterfinger instead)


Directions:

Make and bake cake according to box directions. As soon as it comes out of the oven, poke holes with the handle of a wooden spoon (I did this, but would recommend using some other utensil to do poke the holes; the holes were big and I didn't want to make too many causing the cake to sink in the center, so I didn't think the condesed milk was distributed evenly enough.) all over the cake. Pour sweetened condensed milk over the top.

Let cool completely.

Next spread fudge over the cake, and put in the fridge to set.

When it is cool, spread coolwhip over the top and then top with crushed candy bars. Refrigerate leftovers.


The recipe didn't say to, but I had to microwave the fudge in order to get it thin enough to spread over the cake without tearing the top. I can't remember how long it was in the microwave total because I had to keep taking it out, stirring it and putting it back in for longer. It was probably close to 3 times for 30 seconds each time.


Enjoy!

linking up at 33 Shades of Green for Tasty Tuesday.


Photobucket

Thursday, October 20, 2011

Recipe Time: Pumpkin Bars

Yesterday I made chili and cinnamon rolls for dinner, but because it was chilly outside and I was bored, I decided to make a pumpkin bar recipe that I found on Pinterest. I've never made pumpkin anything before except pie, so I was excited to try these! It is a super simple recipe and the bars are done in no time!

The original recipe can be found here at realmomkitchen.com. The only change I made was ommitting chocolate chips to half the pan of bars.

I actually think the bars taste better today after being in the fridge overnight! I love fall and all the pumpkin recipes! And not only do these taste amazing, but they're also so pretty!


Pumpkin Bars


6 eggs

1 1/2 cup oil (I use canola)

3 cups sugar

1 1/2 tsp vanilla

1 large can (29 oz) pumpkin

3 1/4 cup flour

1 1/2 tsp. baking soda

1 Tbsp cinnamon

1 1/2 tsp. salt


Mix together eggs, oil, sugar, vanilla, and pumpkin. Fold in dry ingredients and pour into jelly roll pan (13 x 18 pan) .  Bake at 350 for 30 to 40 minutes until a toothpick inserted in the center comes out clean. Do not over bake. Frost with cream cheese frosting.


Cream Cheese Frosting

1 (8 oz) package of cream cheese (I use light)

8 Tablespoons butter, softened

1 cup powdered sugar

1 tsp vanilla

(I doubled this recipe for the frosting to cover the entire pan of bars. In the original recipe, she only frosts half the pan)


Blend together cream cheese and butter until smooth. Beat in powdered sugar and vanilla.


Hudson was helping me take pictures!

This recipe makes A LOT of bars for a small family, so it would be a great recipe for parties or family gatherings! I need to call some friends to see if I can take them some tonight!

Linked up here:


Photobucket

Friday, September 23, 2011

Yum!

This past week I managed to tackle two new recipes that I discovered on Pinterest (where else?!).  The first one was Cheese Pinwheel Rolls. I made them for us to eat during the Nebraska football game on Saturday.  They were super easy to make and quite yummy.  Here is the recipe:

Cheese Pinwheel Rolls
makes about a dozen rolls


Ingredients:

1 ball pizza dough (I used the Pillsbury pizza dough found in the refrigerator section)

2 Tbls. butter

1 – 1 1/2 cups shredded cheese (I used mozzarella, but you could use anything that melts well)

Parmesan cheese, grated

kosher salt

freshly cracked black pepper

garlic powder

Directions:
Lay our your dough on a floured counter. If you use a dough ball, roll it out into a rectangle.

Melt butter in microwave and spread with fingers all over dough surface.

Sprinkle with Parmesan cheese.

Sprinkle dough with a thin, even layer of shredded cheese.

Sprinkle with a little kosher salt, fresh cracked pepper and garlic powder. You can also add other ingredients such as, herbs, olives, etc.

Roll the dough length wise into a long tube shape.

Cut it into about 12, 1 inch slices.

Place the rolls, face side up into an 8 x 8, lightly greased baking pan and sprinkle with more Parmesan cheese.

Set baking dish aside covered for about 30 minutes allowing the dough to rise slightly (Mine didn't really rise, so I'm not sure if this step is necessary).

Place in 350 degree oven for about 20 minutes or until tops turn golden brown.

They will bake together, so lift them out with a spatula and place on serving platter.

Pull apart to eat.

We ate ours with marinara sauce and they were so cheesy and yummy!

original recipe found here.


The next recipe we tried is known as "World's Greatest Sandwich" thanks to the movie Spanglish. I remember watching that movie and thinking how awesome that sandwich looked, but forgot all about it until I found the recipe on Pinterest. Actually, my friend Melissa pinned it first and I copied it from her!  Here is the recipe:

World's Greatest Sandwich

from Thomas Keller
makes 1 sandwich

3-4 slices of bacon

2 slices of Monterrey Jack cheese (We used Gouda because that's what we had on hand)

2 slices of toasted rustic country loaf (We used plain white bread)

1 tbsp of mayo

4 tomato slices

2 leaves of butter lettuce (We used Romaine since that's what we had)

1 teaspoon butter

1 egg

Preparation:

1. Cook the bacon until crisp, drain on paper towels

2. Place slices of cheese on one side of toasted bread. Place in toaster oven or under broiler to melt.

3. Spread mayo on other slice of bread top with bacon, sliced tomato, and lettuce

4. On non-stick skillet, melt butter over medium heat. Fry egg, turning over briefly when the bottom is set (keep yolk runny)

5. Slide finished egg on top of lettuce, top with other slice of bread (cheese-side down genius)

6. Place sandwich on plate and slice in half, letting yolk run down sandwich


I love a BLT and this sandwich just kicked the BLT up a notch.  It was delicious!  I think it will become a regular dinner around here!

original recipe found here.


Photobucket

Tuesday, September 6, 2011

Ultimate Dessert

I was once again inspired by something I found on Pinterest. This time it was for a dessert.  This one...

which is originally from kevinandamanda.com.

Doesn't it look amazeballs?! I thought so too, so I made some.

Here are the steps:

First you make chocolate chip cookie dough. Amanda posted her cookie recipe, but I used my own. (If you would like mine recipe, just send me an email and I'll get it to you!) However, any recipe will work. Spread the dough into a greased, 9x13 inch baking dish like so:

Next, you add a layer of Oreo cookies...I know, I'm blowing your mind, right?

I added this picture for affect...are you totally craving Oreos and milk now?! Me too!

The final layer is brownie. I simply used a boxed chocolate fudge brownie mix. Pour it over the Oreos. I'm sure it would be even better if you made the brownie layer from scratch!  Maybe next time...

Bake at 350 degrees for 45-55 minutes.  It should look like this when you cut into it. YUM!! I didn't get to have any with ice cream this time because I took them to my sister's house for a football get together, but I will definitely be making these again and will be sure to eat one hot, right out of the oven, smothered with vanilla ice cream and chocolate syrup!!


Enjoy!!!

Linking up here:
33 Shades of Green

Photobucket

Monday, May 16, 2011

Ice Cream In A Bag

Tonight after dinner I thought it would be fun for us to make a simple little treat for dessert; ice cream ice milk in a bag.  It only takes about 5 minutes and is a great activity to get the kids involved in the kitchen.  My husband had never done it before and neither had Hudson, so I figured it was the perfect time!!  Here is the recipe that we used, but I'm sure there are other variations out there.

Ingredients:
1 cup milk or half and half (we used some of Hudson's whole milk)
2 tbsp sugar
1/2 tsp vanilla extract

Add all ingredients together in a small Ziploc bag and seal.

Then add 6 tbsp rock salt to a large Ziploc bag filled half full of ice. 

Place small bag inside large bag, seal and shake for at least 5 minutes.  You should be able to feel the contents of the small bag begin to harden.  After 5 minutes or so, remove small bag from large bag, quickly wipe small bag with a damp cloth to remove salt water (so you don't transfer any to your ice cream) and scoop into bowls.  Enjoy!!

The Churning Process:


 We had to take turns shaking the bag because it gets so cold!  It might be helpful to wear gloves or mittens.

 Hudson was working hard and having fun!

 Here is an after picture right before I scooped into our bowls.

 It begins to melt pretty fast, so you have to be quick!

 You can even dress it up with toppings.  Hudson added sprinkles...

It turned out to be a big success.  Both the hubby and Hudson liked it, so it looks like we'll be making it again soon...maybe even tomorrow night!!


Photobucket

Tuesday, April 19, 2011

Recipe Time: Pickle Wrap Dip

**I'm reposting this since summer party season is rapidly approaching.  It's the PERFECT party dip!!**

If you are like me and LOVE pickle wraps, you'll just love this dip. I got the recipe from my friend Abbie. It's about the easiest dip you can make and is great to take to potlucks. I make it for almost every party we host because so many people request it. I hope you try it and enjoy as much as I do!


Ingredients
16 oz of cream cheese (whipped or softened)
16 oz of sour cream
2 packages of corned beef cut into small squares
1 jar of baby kosher dill pickles
1 tbsp water


Directions

Mix together sour cream and cream cheese. Add corned beef. Chop pickles in food processor and add to sour cream, cream cheese and beef. Add 1 tbsp of water to loosen. Mix all ingredients together with a hand mixer. Chill before serving and serve with tortilla chips or crackers.


Here is where I'm linking up today:


Photobucket

Tuesday, March 29, 2011

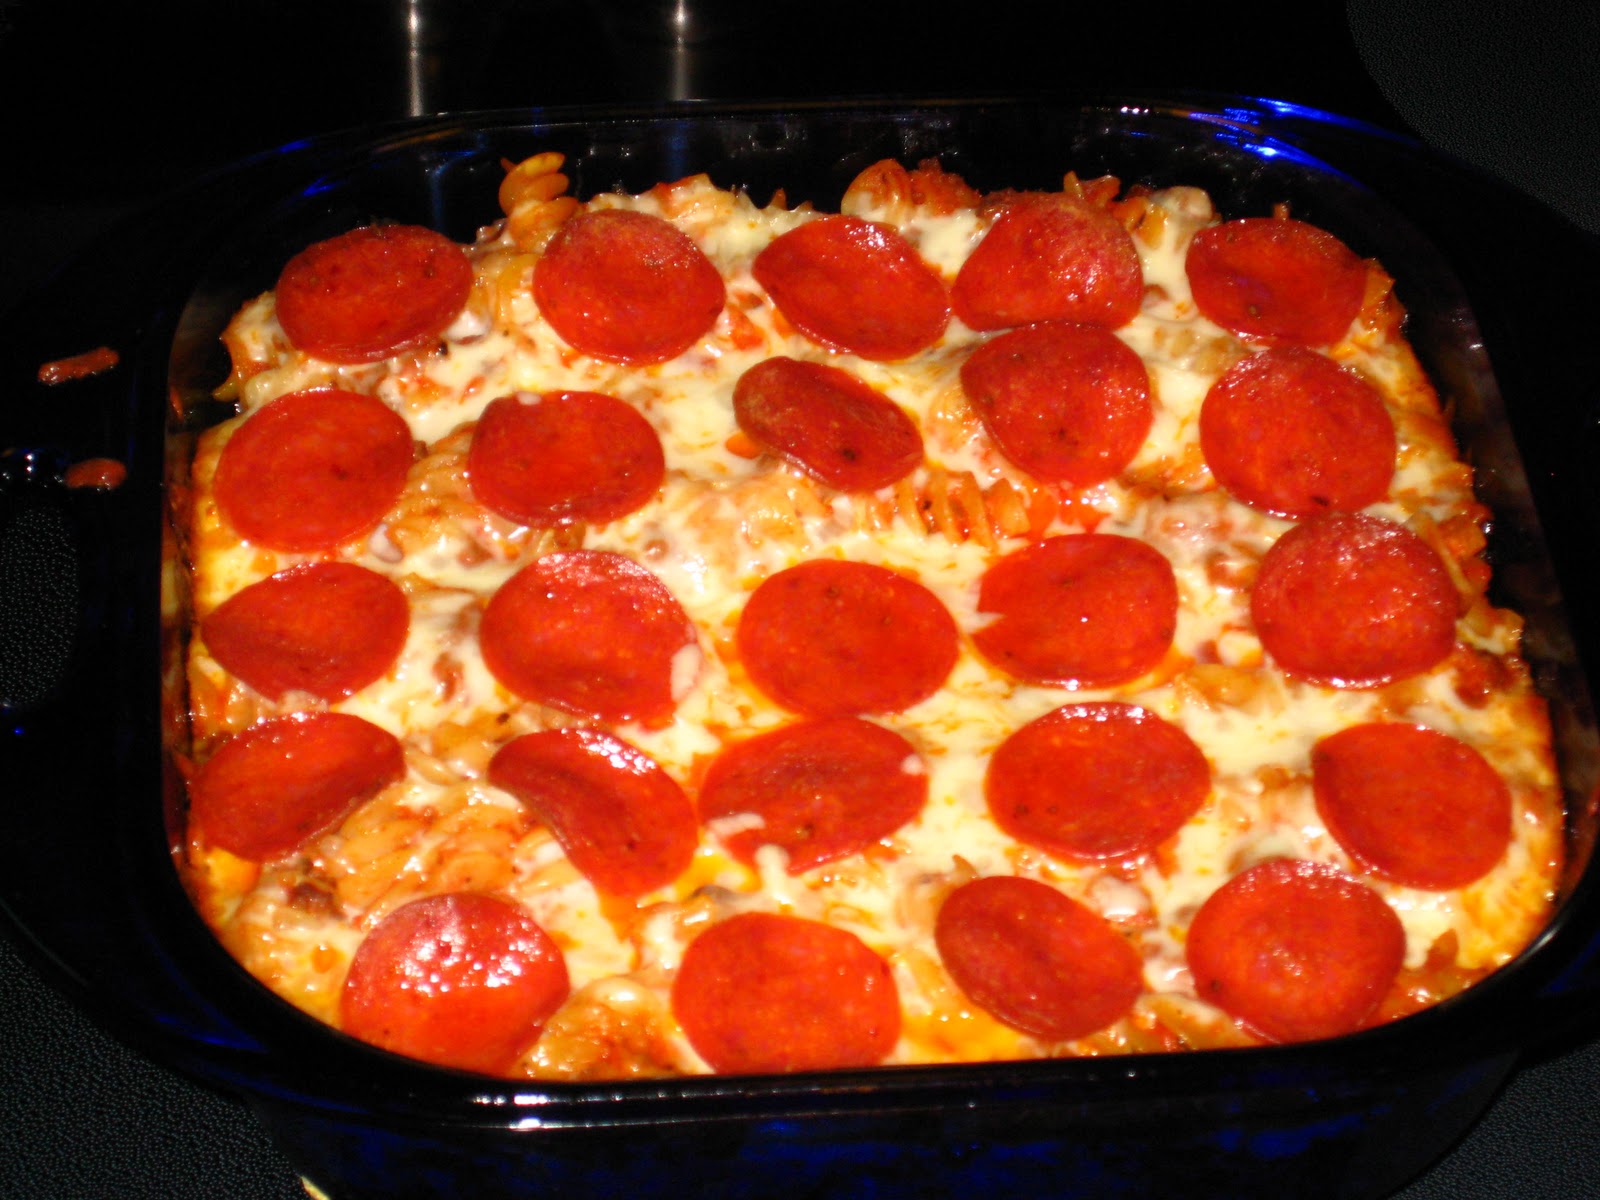
Recipe Time: Easy Pizza Pasta Casserole

Recipe from Food.com

Prep Time:  20 mins.
Total Time:  1 1/4 hours
Serves:  20

I cut this recipe in half and still had a lot left over.  It was really good and good for lunch the next day too!

Recipe:
2 lbs ground beef  (I used 1 lb)
1 large onion, chopped  (1/3 of the onion)
1 clove garlic, minced  (half a clove)
1 teaspoon Italian seasoning  (I used 1/4 teaspoon)
2 tbsp olive oil  (I used 1 tbsp)
2 jars of spaghetti sauce  (1 jar of sauce)
16 oz rotini pasta, cooked and drained  (8 oz of pasta)
5 cups shredded mozzarella cheese  (2 1/2 cups of cheese)
8 oz sliced pepperoni  (I used enough pepperoni to cover the top)

Directions:
Preheat oven to 350 degrees.
Brown ground beef, onion, garlic and seasoning in oil, Drain.
Stir in pasta, spaghetti sauce and 2 cups of cheese.
Place mixture in greased 9x13 or 8x8 baking dish.
Sprinkle with remaining cheese and top with pepperoni.
Bake 25-30 minutes, until heated through.


This was pretty tasty and very kid friendly...even the little guy liked it and he won't eat anything these days!  It reminded us a lot of lasagna.  It would make a great freezer meal.  To freeze, cover tightly and freeze up to 3 months.  To bake, thaw casserole in refrigerator overnight and bake at 350 degrees for 35-40 mins, until hot.


Photobucket

Thursday, March 3, 2011

Recipe Time: S*#& on a Shingle

AKA: Chip Beef or Corned Beef and Gravy on Toast

I guess it got the name S*#& on a Shingle because they used to serve it in prison...sounds tempting huh?!  Anyway, my mom has been making it for us since my sister and I were little.  Back then I didn't like it much, but it's grown on me over the years and now it's one of those stick-to-your-ribs meals that sounds delicious on a cold winter night.  Hopefully those kinds of nights are soon to be long gone for the year, but if not, this recipe is super easy and can be spiced up anyway you want.

Ingredients:
1 pkg. sliced corned beef  (I use Buddig)
2 tbsp unsalted butter
2 heaping tbsp flour
1 cup (at least) of milk  (I use low fat milk, but any kind is fine)
Salt and Pepper to taste
4 slices of bread for toast and butter to spread

Optional Ingredients:
onion powder
garlic powder
cayenne pepper

Directions:
Cut entire package of beef into small squares.  Set large skillet over medium heat and add butter and beef.  Stir together until butter is melted.  Add heaping tablespoons of flour and let flour cook for 1 minute, stirring constantly.  Add milk slowing, constantly whisking into other ingredients to form a smooth gravy.  The gravy will thicken quickly, so continue to add milk until you have to right amount of gravy that you need.  You may use more or less than 1 cup of milk depending on the desired amount of gravy.  Once you have the desired amount; add salt and pepper to taste as well as any other seasonings.  Toast bread and spread with butter then top with gravy and serve immediately. 


This is a really old recipe, but worth trying, especially if you are a gravy lover like me! 

I'll pretty much eat anything that involves gravy!!  Yum!


Photobucket