Featured

Showing posts with label Crafting. Show all posts

Tuesday, November 6, 2012

Pinterest Challenge-Fall 1012 Edition

I knew I wanted to do a season related project and decided to go with making a Thanksgiving banner. I pinned one I liked a while ago and used it as my inspiration.

My inspiration came from It's The Little Things That Make A House A Home. I really liked the simplicity of her letter banner that can be found here.

Her banner was very simple and I knew I wanted to glam mine up a bit, so this is what I came up with. My whole goal was to make something sparkly to hang on the barn door in our living room. I think I accomplished my goal!


Unfortunately, there were a few spots where the Mod Podge dried before I got the glitter added, but you really can't tell unless you're close up like this. I kind of think it adds a little rusticness to it anyway. Is that a word, rusticness?! I'm going with it.


This project ended up being totally free!

Everything I used, I already had on hand.

Supplies:

white card stock

Martha Stewart smoky quartz glitter

Mod Podge

paint brush

twine

hot glue gun

Directions:

I did this the hard way and simply printed out the letters in the different fonts I wanted to use onto card stock and then cut them out using scissors. (I printed them in a soft gray color so that it wouldn't show through the glitter) I could've used my Silhouette machine, but didn't think of it until after I started cutting by hand.

After they were all cut out, I just used my paint brush to apply Mod Podge to one letter at a time and then sprinkled it with the glitter.

Once the letters were all glittered, I used my hot glue gun to apply small dots of glue to the backs of the letters and lightly pressed the twine into place.

SO easy!

I really like how they turned out. You can't really see how pretty the glitter is in these photos, but it looks fantastic in person!

Don't forget to check out It's The Little Things That Make A House A Home to see my inspiration!


Photobucket

Thursday, October 4, 2012

I Want My Own Mummies

I love Halloween. It's always been my favorite holiday, until recently replaced by Christmas since having kids. Maybe it's because I have so many great memories from my childhood Halloweens. Whatever the reason, I also love to decorate for Halloween. I don't have much that I really love at the moment, but I'm slowly getting there.

I wanted to make a few decorations this year and I found a great tutorial for mummies made out of glass jars on Pinterest. You can find the original post for the mummies pictured below here. These were made by the girls at Crafts reDesigned:
My inspiration


My mummies!


The glittery spider came in a package of 8 from a local store here in Omaha. I have plans for the rest of them that I'll share later.

Aren't they so cute?! I love how they turned out!


Supplies:
various sizes of glass jars (I used salsa jars)
1 roll of white gauze
scissors to cut the gauze
Mod Podge
paint brush
googly eyes
super glue or craft glue to attach the eyes

Directions:
Make sure your jars are clean. Then cut strips of gauze (any length you want) and then cut those strips in half the long way. Use your paint brush to apply Mod Podge directly to the jar and then start wrapping the gauze on top of the Mod Podge, repeating the process from the bottom to the top or visa versa. Then let it sit aside until it dries. After it's dry you can rough it up a bit by gently tugging at the gauze until you get the desired affect. Once that's done just use the glue to attach the eyes and you're finished! I added tea lights to mine, but haven't had the chance to light them yet. I also just stuck the spider on hoping it would stay without any glue and it worked!

This project only cost me $2.00, the price of the gauze. I had everything else on hand. I love inexpensive crafts!


Photobucket

Wednesday, September 5, 2012

Fall Bucket List

**Updated**

Even though we're still wrapping up our Summer Family Fun list around here, I wanted to get a head start on some of my Fall/Halloween projects so that I can share them with you and maybe inspire you a little.

Technically, summer isn't over until September 21, but it's already starting to feel a little like Fall with football starting and some of the trees around us are so confused by the crazy weather this summer that they're already starting to lose their leaves! So weird! I even bought a Fall scented candle at Target yesterday because they had them on sale. That probably means I'll be sick of it all by October! Just kidding! This is my favorite time of year!

Here is a peek at my family's Fall Bucket List.


**Update**
Here is the link if you would like your own copy!

THIS FILE IS FOR PERSONAL USE ONLY.


I can't wait for the temps to cool down a bit and Fall is in full swing!

linking up here:


Photobucket

Tuesday, August 14, 2012

Kid Craft: Football Sensory Bottles

After making the Fireworks in a Bottle sensory craft, I had all kinds of ideas for more sensory bottles swirling around in my brain. Both of my kiddos really liked the bottles and Hudson had fun making his own, so I knew it would be something we would do again.

Since football season in just around the corner, and in our house, we are pretty big college football fans, I thought making some football themed bottles would be fun! We made two bottles again, but this time we made one bottles with Nebraska Cornhusker colors and one bottle with Iowa Hawkeye colors. We are a divided house when it comes to football. I'm the Nebraska fan and my hubby is the Iowa fan.

Anyway, on to the craft!
Football Sensory Bottles

supplies

plastic water bottles
ribbon-I used red & white, black & yellow
football confetti
glitter

instructions

Cut ribbon into strips of all different lengths. I was trying to make my ribbon resemble pom poms.

Add the ribbon to empty bottles.

Add football confetti to bottles.

Add glitter to bottles. I used silver because that's what I had on hand, but I think it would be cool if you used the school colors. *Tip* I made a funnel out of a sheet of paper so that Hudson wouldn't get it all over the place.

Once you have everything added to the bottles that you want, fill the bottles with water leaving a small amount of space at the top and then seal the lids on with a little bit of glue. By sealing the lids with glue, you don't have to worry about the lids coming loose and the contents spilling out.

Let them dry for a few minutes and then they're ready to go! Shake, shake, shake and watch it swirl!


Cost breakdown:
bottles-free, had on hand
red, white, black and yellow ribbon-$2.00, each roll cost $.50 at Michael's
football confetti-$.99 at Michael's
silver glitter-free, had on hand

total: $3.00

This is a simple and inexpensive project for little kids. I already have an idea for a fall inspired sensory bottle. I'm obsessed!

If you end up making your own, come back and post a link. I would love to see what teams you cheer for and how yours turn out!

Have Fun!


Photobucket

Monday, August 13, 2012

Kid Craft: Washi Tape Binoculars

Hi! I'm back with a fun kids craft to share with you. Now this is not an original idea. I have seen other binocular crafts while surfing blogland, but I've never seen any made using washi tape.

This would be a great craft for older kids to make themselves, but my kids aren't quite old enough yet.

I've been meaning to make some for Hudson for some time now, and finally did it yesterday! I know, I know...but sometimes I just don't have as much time in the day as I would like. I'm trying harder to make more time for crafting and diy though! There are just so many things I want to make! Ahhhhhh...

On to the project!


Washi Tape Binoculars

supply list:

2 cardboard tubes-I used toilet paper rolls, but you could also cut a paper towel roll in half

washi tape-I used 4 different patterns

stapler or hot glue gun

hole punch or scissors

ribbon, string, baker's twine, etc. for the strap

instructions:

The first step is to decorate your rolls with washi tape. This is the fun part! You can make them look however you want! Hudson has been really into hunting for dinosaurs lately, so I wanted to make his look safari-ish (I think I just invented a word...). I used scissors to cut the tape so that my lines would be straight, but you can definitely just tear it.

one down, one to go

completed rolls

Step two is attaching the two rolls together. I used a stapler and attached them together where the washi tape seams came together. I didn't really want to get out my glue gun, so I convinced myself that the staples would hold better anyway, and it actually worked out great! *note* If you're worried about the staples not being safe for your kiddos, then you can attach them together with glue or even tape. This was not an issue with Hudson's binoculars, but I made some for Harper too (so that she wouldn't constantly be trying to steal Hudson's) and I made sure to press the sharp ends tight to the cardboard and then covered them with pieces of washi tape. *not pictured*

here is a shot of the staples

Once the rolls are attached, you can use a hole punch (or scissors) to make a hole on each side of the binoculars where you want the string for the strap to be.


Then chose a ribbon or string, whatever you have laying around, string the ends through the holes and double knot. You now have an awesome pair of washi tape binoculars!!


That's it! So, so simple! I think it took me less than 15 minutes to make and they turned out great! I did it while I was sitting outside on the deck watching Hudson play soccer. They were instantly a huge hit. He was immediately using them to hunt for dinosaurs! Look out T-Rex!

I love washi tape! Don't you?! There are so many great projects you can make with it!

I'll be back tomorrow with another kid friendly craft!

Have a great Monday!

linking up to these fabulous parties:

http://www.bystephanielynn.com
http://craftomaniac.blogspot.com/
http://www.skiptomylou.org/
http://makingtheworldcuter.com
http://www.keepingitsimplecrafts.com
http://www.tipjunkie.com
http://www.houseofhepworths.com
http://www.somewhatsimple.com/
http://www.733blog.com/
http://www.myrepurposedlife.net
http://tatertotsandjello.com/
http://www.bystephanielynn.com/


Photobucket

Thursday, July 12, 2012

Summer Pinterest Challenge

I know I'm a little late to the party, but I just finished my Pinterest Challenge project last night.


I've been wanting to make a Minky blanket for Harper (I'm sort of hoping she'll get attached to it so that she'll have something to comfort her) and found an awesome tutorial put together by Jenny at http://icraftblog.blogspot.com/! She has great, easy to follow photos and instructions.

I had never sewn a blanket before, actually the only two items I've ever sewn were some boxer shorts in junior high Home Ec and then I recently finished curtains for Harper's room, and was really intimidated. But I figured why not give it a try anyway. I mean, what's the worst that could happen?

I did it!!


 I found this awesome fabric on www.etsy.com. Isn't it just so pretty?! I adore the colors!

 It measures about 17 inches wide and 25 inches long. I used one of Hudson's lovey blankets as my size guide. I didn't want a big blanket. I wanted one that she would be able to drag around with her.

For the back side, I used a white Minky fabric. I hope it doesn't get too stained! I could have picked a color, but I really wanted the patterned side to pop.

Since I used white Minky, I thought is would look best if I used white thread as well. I really wanted it to look good!

I absolutely LOVE it!

It turned out SO much better than I thought it would given my sewing skill level. I'm so happy with it, that I just might have to knock out a few more!

Even if it wouldn't have turned out as good as it did, I still would've loved it just the same. It's so much better making something special for someone than buying it. I think she'll love it even more someday when she understands that I made it.

Cost breakdown
This blanket only cost me about $8.50 to make, much less that if I would've bought one!

1/2 yard scalloped fabric-$5 from etsy.com
1/2 yard white minky fabric-$3.50 using a 50% coupon at JoAnn
I already had the white thread


Winter Pinterest Challenge Update: I still have Hudson's alphabet book sitting finished on my MyPublisher account. I haven't forgotten about it. I've been waiting for a big sale. The shipping on those books alone is $10 and I really don't want to spend $30 on such a small picture book. I'm considering redoing it on another site. Maybe snapfish? I'm open for suggestions! Once I finally order and receive it, I'll definitely be sure to post photos.


Photobucket

Tuesday, July 3, 2012

Craftaholics Anonymous Summer Gift Exchange 2012

I've always wanted to participate in The Craftaholics Anonymous Gift Exchange and finally signed up this round. She does two gift exchanges per year; one in the summer and another around Christmas. I had so much fun doing this exchange that I think I'll sign up for the holiday exchange as well!

I just mailed out my gift last Saturday. I knew when I signed up that my goal was to make as personal of a gift as possible. Then I remembered that I had pinned a latitude and longitude address sign from etsy.com and I knew that was the perfect gift! And now that I've made one from my giftee, I'll definitely be making one for myself next! I am so happy with the way it turned out! I just hope that Barbara likes it as much as I do!


I hand painted the numbers, but traced a stencil to make sure they would look extra crisp.

I wanted it to look a little weathered, so I used the dry brush technique with just a small amount of white paint.

I used a compass rose symbol that I found on Google images. I think it adds that special something.


(I blurred out some of the coordinates for her privacy)

I received my gift in the mail yesterday all the way from Jessie in Florida. She made me some pretty little bracelets! Very thoughtful! Thanks Jessie!

I really like how this one looks ombre. So cool!

Both the kiddos are loving this one!

The gift exchange was lots of fun! If you've never done it, I would definitely recommend joining the fun!

Thanks for hosting such as awesome event Linda!!


Photobucket

Tip Junkie handmade projects

Friday, June 1, 2012

Documenting Our Summer Fun=Summer Captured 2012

I had an idea about a special way to document the activities that we actually cross off of our Summer Family Fun List. I want to be able to incorporate a special insert(s) into my Project Life album. I was inspired by this insert idea from Elise over at http://eliseblaha.typepad.com. She used a coin pocket page purchased from amazon.com to display all her instagram vacation photos.

photo source here

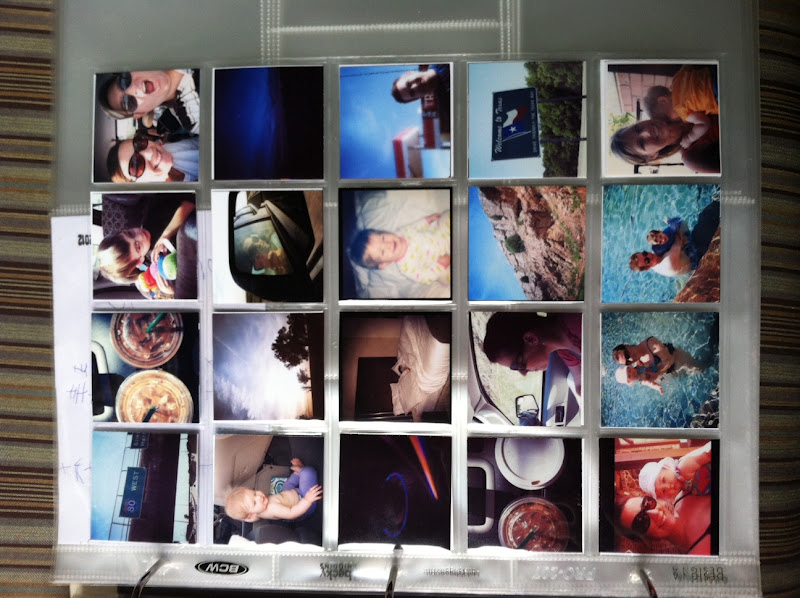
So Genius! I went straight to amazon to order some of my own! They hold 20 photos in the front and 20 in the back side, which I also thought would be perfect for this project. This is what they look like:


I've already used one page to display our family vacation instagram photos and it's probably my favorite page so far! Here's a look:

Looks pretty cool, right?! I think so too!

My next source for inspiration comes from Marcy Penner over at http://www.marcypenner.com/?p=7224.
She used the same concept to document Day In The Life this year, only she made her own pocket page by sewing one out of a 12x12 page protector in order for it to fit her Project Life album. I really love how she alternated between an instagram photo and a small journaling card in order to add words to her photos. Take a look. Love it so much!

So, my idea is to fill up three 20 pocket pages using the fronts and the backs. I plan to alternate an instagram photo of each activity and a small journal card detailing the fun we had. Our list contains 50 different activities, so in all I'll need 100 pockets, which will take up 2 1/2 pages leaving just the back side of the third page empty. I decided that I can either fill up the back side with some pretty patterned paper, one giant photo cut up to fit the squares or, if we end up adding more activities to the list, I will have room to incorporate those into the spread as well.

This seems like such a great way to not only document each activity, but also to make us more likely to complete the entire list, which is all about having FUN together and focusing some attention on family time. I may even print out another copy of the list and insert that into an 8 1/2 x 11 page protector and add that in the same spot. I have a lot of ideas flowing! I do know for sure that we plan on tackling one of the activities this weekend, so I think I'll add the inserts in between the first week of June spread.

I can't wait to see how it turns out! And if any of you are fellow Project Life junkies like me and you want to join in the fun, I would love a link to check out how you plan to document all your summer fun activities! Just leave it in the comments section or send me an email!

I think I'll nickname this project Summer Captured 2012, hence the blog title.

I'll be posting updates as I add to my pages.


Here's to a fun-filled summer full of family and of course photos!


Photobucket