Featured

Tuesday, September 27, 2011

Week In The Life Project

I learned about Ali Edwards blog through Becky Higgins and that's where I discovered her follow along project called Week In The Life. It's a week long journal and photography project documenting everyday life at that moment in time. Ali has been doing it for a few years along with her followers and her books are just awesome when she's done. This year she did it in the summer for the first time, but I discovered her blog a week after she completed her week, so I couldn't follow along with her this time. Instead I decided to pick a week in the Fall to do mine. I just started yesterday and let me tell you, it's a lot of work (as she mentions on her blog), but I can already tell it will be so worth it in the end when my book is complete. I think it will be fun to be able to look back someday and see just what exactly we were doing around here all day everyday! Since it will be a little while before I can show you my finished project, I thought I'd share with you some pics from Ali's blog:


All of these images are from Ali's 2011 Week In The Life.  They can be found by clicking here along with a great video about the process.

Ali's books are all really beautiful. I love the layouts and colors that she chose for this year's book. I can only hope mine will turn out to be half of what her's are! She is such an inspiration!

Her blog is great too! She shares all kinds of great, photography, project ideas and inspiration. You should go and check it out. You'll love it!


She also shares a list of all the product information on there as well, so you know where you can find all the supplies she used.


Photobucket

Monday, September 26, 2011

My Dream Neighborhood

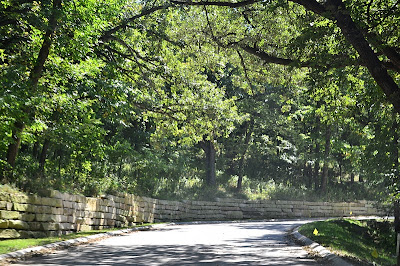
Jeremy and I have this thing where we go get coffee and then drive around our dream neighborhood. We do it at least a couple times a month. Usually on a sunny Saturday or Sunday morning or when were trying to get the kids to settle down and take a nap! Anyway, I decided to take my camera the other day to take some pics of the entrance landscaping and a few of the houses. The pics aren't great because it was really bright and sunny, but the houses are still beautiful! The neighborhood is located along the Elkhorn River, so some of the lots back up to the river and the others are up in the higher area. There are lots with tons of trees and lots that are more open. There is even a natural walking path that runs through the whole area past ponds and a creek. Just awesome! I guess you could say we are kind of stalkers...

My favorite part of the entrance is the double waterfall. Amazing!

I love these trees. I have no idea what they are, but they're so pretty.


 This is the lot we want...I'm sure it will still be available 20 years from now! Ha!

These houses have amazing landscaping. You can tell that they put a lot of effort into making it look natural so that it blends in with the surroundings.


This picture does not do this house justice at all! It's located on a corner lot and has a small guest house built across the driveway. It's very private. I love the way they positioned the house on the lot. Plus, it has a water feature, but you can't see it driving by.

 This house has a cottage feel. I really like the front door.

 This one is situated further back away from the road. It's extremely private with all the trees. I think this one is my favorite!

These houses are so much bigger and prettier in person! I would love to build a house here someday! 
It's fun to dream, right?!

Photobucket

Friday, September 23, 2011

Yum!

This past week I managed to tackle two new recipes that I discovered on Pinterest (where else?!).  The first one was Cheese Pinwheel Rolls. I made them for us to eat during the Nebraska football game on Saturday.  They were super easy to make and quite yummy.  Here is the recipe:

Cheese Pinwheel Rolls
makes about a dozen rolls


Ingredients:

1 ball pizza dough (I used the Pillsbury pizza dough found in the refrigerator section)

2 Tbls. butter

1 – 1 1/2 cups shredded cheese (I used mozzarella, but you could use anything that melts well)

Parmesan cheese, grated

kosher salt

freshly cracked black pepper

garlic powder

Directions:
Lay our your dough on a floured counter. If you use a dough ball, roll it out into a rectangle.

Melt butter in microwave and spread with fingers all over dough surface.

Sprinkle with Parmesan cheese.

Sprinkle dough with a thin, even layer of shredded cheese.

Sprinkle with a little kosher salt, fresh cracked pepper and garlic powder. You can also add other ingredients such as, herbs, olives, etc.

Roll the dough length wise into a long tube shape.

Cut it into about 12, 1 inch slices.

Place the rolls, face side up into an 8 x 8, lightly greased baking pan and sprinkle with more Parmesan cheese.

Set baking dish aside covered for about 30 minutes allowing the dough to rise slightly (Mine didn't really rise, so I'm not sure if this step is necessary).

Place in 350 degree oven for about 20 minutes or until tops turn golden brown.

They will bake together, so lift them out with a spatula and place on serving platter.

Pull apart to eat.

We ate ours with marinara sauce and they were so cheesy and yummy!

original recipe found here.


The next recipe we tried is known as "World's Greatest Sandwich" thanks to the movie Spanglish. I remember watching that movie and thinking how awesome that sandwich looked, but forgot all about it until I found the recipe on Pinterest. Actually, my friend Melissa pinned it first and I copied it from her!  Here is the recipe:

World's Greatest Sandwich

from Thomas Keller
makes 1 sandwich

3-4 slices of bacon

2 slices of Monterrey Jack cheese (We used Gouda because that's what we had on hand)

2 slices of toasted rustic country loaf (We used plain white bread)

1 tbsp of mayo

4 tomato slices

2 leaves of butter lettuce (We used Romaine since that's what we had)

1 teaspoon butter

1 egg

Preparation:

1. Cook the bacon until crisp, drain on paper towels

2. Place slices of cheese on one side of toasted bread. Place in toaster oven or under broiler to melt.

3. Spread mayo on other slice of bread top with bacon, sliced tomato, and lettuce

4. On non-stick skillet, melt butter over medium heat. Fry egg, turning over briefly when the bottom is set (keep yolk runny)

5. Slide finished egg on top of lettuce, top with other slice of bread (cheese-side down genius)

6. Place sandwich on plate and slice in half, letting yolk run down sandwich


I love a BLT and this sandwich just kicked the BLT up a notch.  It was delicious!  I think it will become a regular dinner around here!

original recipe found here.


Photobucket

Thursday, September 15, 2011

Blog Your Heart-A Challenge

I came across a sweet blog called Just Me, My Soldier, and Our 4 Little Chicks while reading Ali Edwards blog.  She wrote a post called Blog Your Heart, A Challenge. She is challenging her readers to blog about whatever happens to be in their heart at the time. I think that sounds like an amazing idea, so here is my entry.

What's in my heart:

My heart is filled with so much love for my beautiful babies.  Hudson is turning into such a well behaved (for a 2-year-old) little boy and Harper is such a sweet, happy little baby.  They make our family whole and fill our home with happiness.

My worries for the past 8 months have been put to rest because my husband finally got a job today!  The company he worked for closed unexpectedly in February and he's been looking for a new one since. He has been working hard on a website he and his partners are launching here in Omaha soon, so I guess that was the reason that he didn't find a job right away, so that he would have the time to finish and launch the website.  However, times were hard. Things got tense.  We gave up a lot and had a new baby right in the middle of it all. But it doesn't matter now.  Now I can finally relax and know that we'll be okay...I can breathe again.

I need a little more "me" time. I feel like mom's aren't supposed to admit that they can't do it all and stay sane, but I'll admit it.  Being a stay-at-home mom is hard...so hard.  Rewarding, but hard.  Not to mention the fact that none of my friends stay at home with their kids.  My sister does, but she lives in a different city. My best friend does, but she also lives in a different city.  Bummer.  I just need to make sure that I take the time I need in order to be the best mom and wife I can be.

I also need to be sure to make time for my husband. So often the kids get all my energy and attention during the day that by the time my husband gets home, I don't have anything left. That's not fair to him. Plus, I miss our time together.

Well, that's all that's in my heart and my thoughts at the moment. I would love to hear from anyone who would like to partake in the challenge.  It's nice to know that there are others who can relate and understand the hardships and find the same joy in the simple things!

If you'd like to check out Stephanie's blog, Just Me, My Soldier and Our 4 Little Chicks, click here.


Photobucket

Wednesday, September 14, 2011

Fall Festivities List

I decided that since my family and I had so much fun with compiling and completing our Summer Family Fun List, it would be just as much fun to make one for the Fall as well.  I mean Fall is my favorite season and I absolutely LOVE all the activities, especially Halloween! So I threw together this list and thought I would share the PDF with you, so you can join in the fun!  It's a Word document, so you can even personalize it for your family. 
I apologize for the picture quality.  The lighting is sooo poor in this part of my house!


 Click Here for your own Fall Festivities List!  Enjoy!!

linking up here:
Tip Junkie
Someday Crafts
Night Owl Crafting
733

Photobucket

Monday, September 12, 2011

Supper Clubs, Yay or Nay?

I've always wanted to be a part of a supper club. It sounds like so much fun being able to get together with friends and share new recipes!  I don't know anyone who's in one nor have I even heard anyone talk about a supper club.  I had no idea how to start one or who I would ask to join.  Then last month in Everyday Food magazine there was a small article about how to get one started. It was as though Martha Stewart was reading my mind! She really is amazing! Here is the article that I tore out of the magazine:


So, now I'm totally excited about getting one started! How hard can it be, right?  All I need to do is figure out which of my friends would be willing to join in and actually follow through with it.  That's actually harder to do than doing the planning and the cooking!! So many of my friends have young children and very busy schedules.

But, I like the idea of having a dinner once every couple of months. That way it won't be too overwhelming for most people or too much of a commitment that they end up backing out all the time. And now that we have Facebook, it will totally help keep the information flowing.

 If anyone is part of a supper club and you has some pointers to steer me in the right direction, that would be great!  I think I'm gonna need all the help I can get in order to get it started! I'll be sure to keep you posted.

Photobucket

Thursday, September 8, 2011

Photography Class

I recently took a photography class that I purchased off groupon.com.  The class was supposed to teach us how to take better pictures of kids, however, the instructor didn't even really talk much about photographing kids at all.  The main lesson of the class was how to better use your camera by using it on the manual setting.  I hadn't really taught myself much about that yet, so the class was extremely helpful in that aspect. But I'm glad I only paid $50 instead of $200, because it wasn't worth $200!  Here are just a few of the pictures I've taken since learning how to use the manual setting:


I'm really excited that I'm learning so much and loving all the great pictures I'm able to take now!

Photobucket

Tuesday, September 6, 2011

Ultimate Dessert

I was once again inspired by something I found on Pinterest. This time it was for a dessert.  This one...

which is originally from kevinandamanda.com.

Doesn't it look amazeballs?! I thought so too, so I made some.

Here are the steps:

First you make chocolate chip cookie dough. Amanda posted her cookie recipe, but I used my own. (If you would like mine recipe, just send me an email and I'll get it to you!) However, any recipe will work. Spread the dough into a greased, 9x13 inch baking dish like so:

Next, you add a layer of Oreo cookies...I know, I'm blowing your mind, right?

I added this picture for affect...are you totally craving Oreos and milk now?! Me too!

The final layer is brownie. I simply used a boxed chocolate fudge brownie mix. Pour it over the Oreos. I'm sure it would be even better if you made the brownie layer from scratch!  Maybe next time...

Bake at 350 degrees for 45-55 minutes.  It should look like this when you cut into it. YUM!! I didn't get to have any with ice cream this time because I took them to my sister's house for a football get together, but I will definitely be making these again and will be sure to eat one hot, right out of the oven, smothered with vanilla ice cream and chocolate syrup!!


Enjoy!!!

Linking up here:
33 Shades of Green

Photobucket